Project Setup
Projects are similar to folders that store your HOLOPHONIX Presets, Venue drawings, 3D models, HRTF files, and other resources.
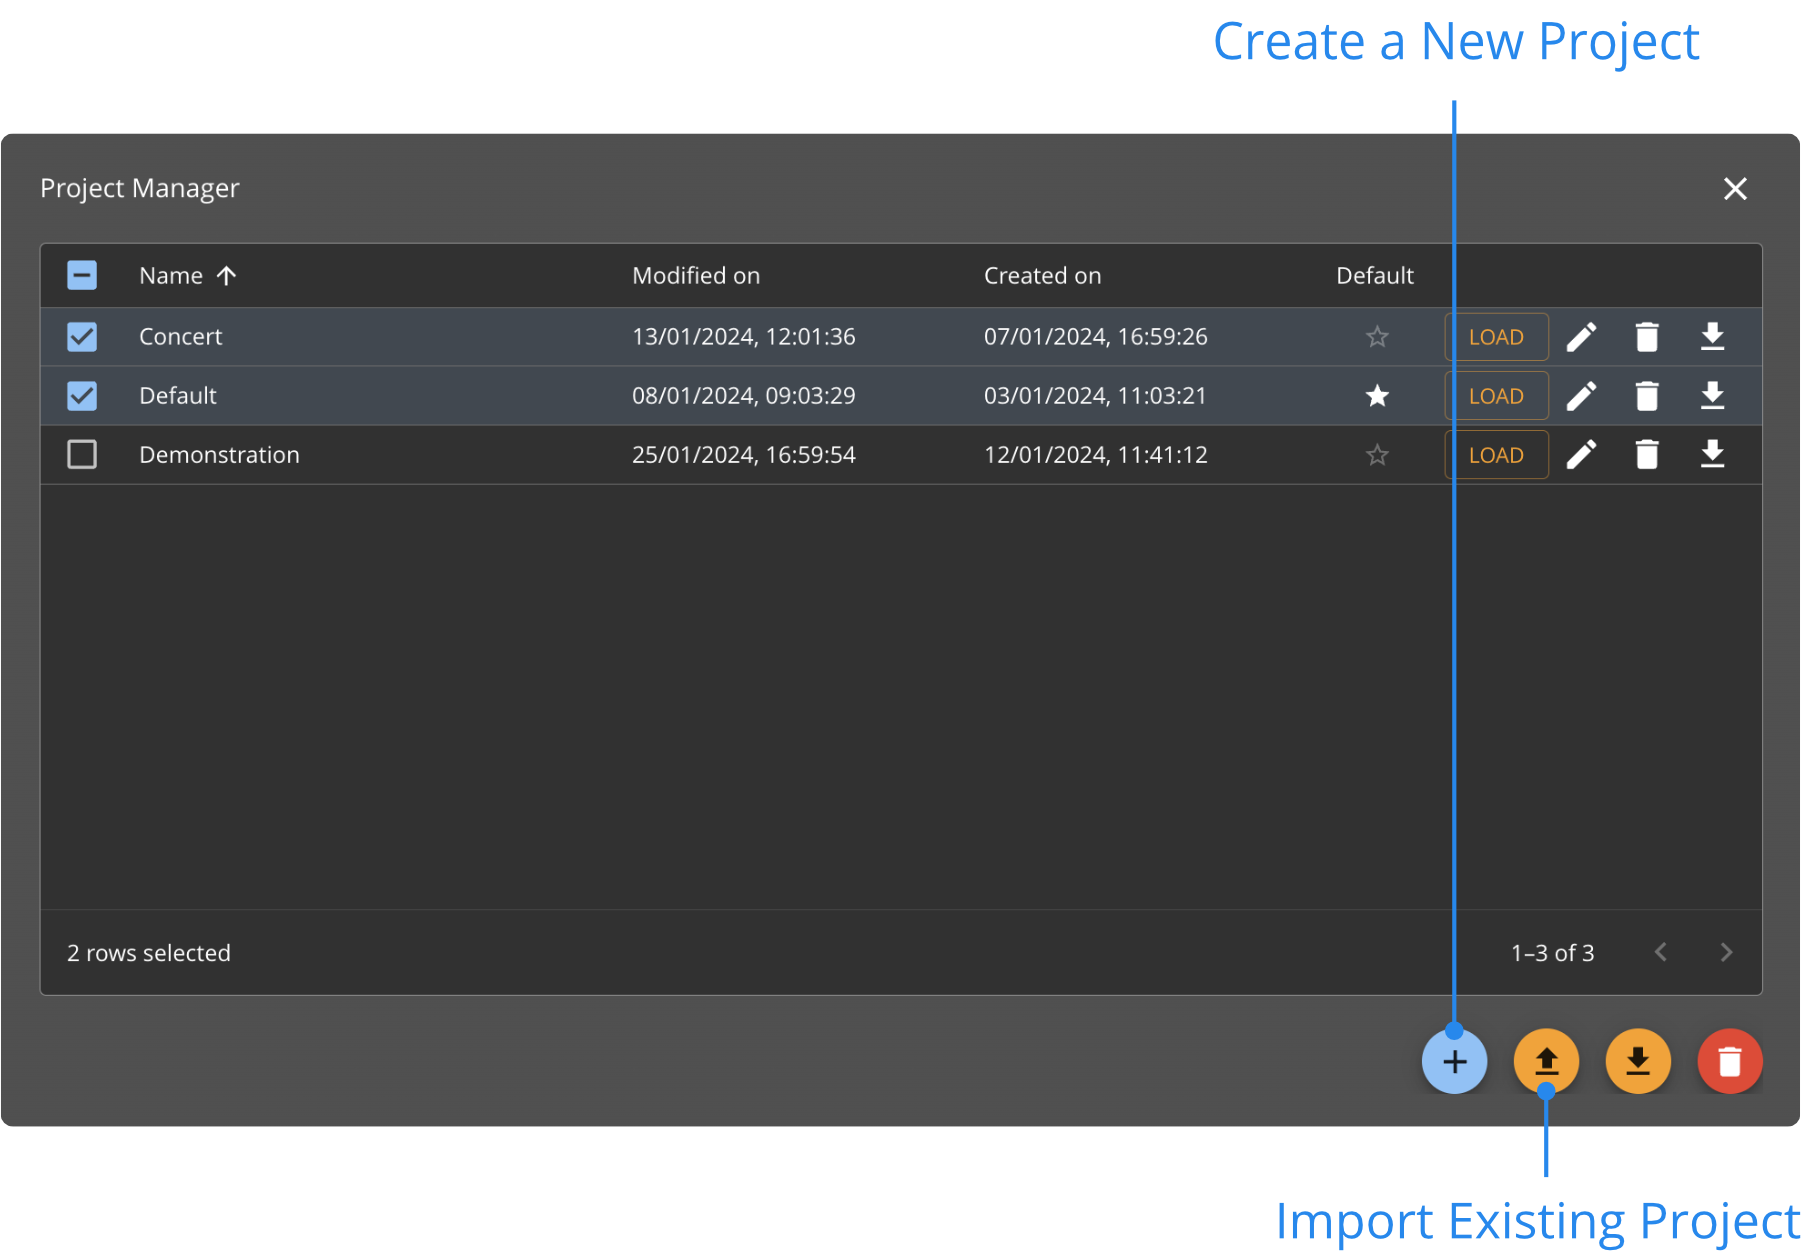
Create a new project
To create a new project or load an existing one, go to the File menu, and select Open Project Manager.... If you are opening HOLOPHONIX for the first time, or if no project is loaded, then the Project Manager window will be automatically displayed at startup.
Click on the add icon, and fill in the project's name. You can also import an existing project with the Import button.
Setup the Default Project
You can define a Default Project that will be automatically loaded at startup. Click on the "★" (star) icon to choose the default project.

Import venue 3D Model or 2D Drawings
The HOLOPHONIX user interface relies on a 3D visualization engine, which you can use to position your objects (Sources and Speakers). To help you with space visualization, you can load a 3D Model of your venue, or simpler 2D Drawings.
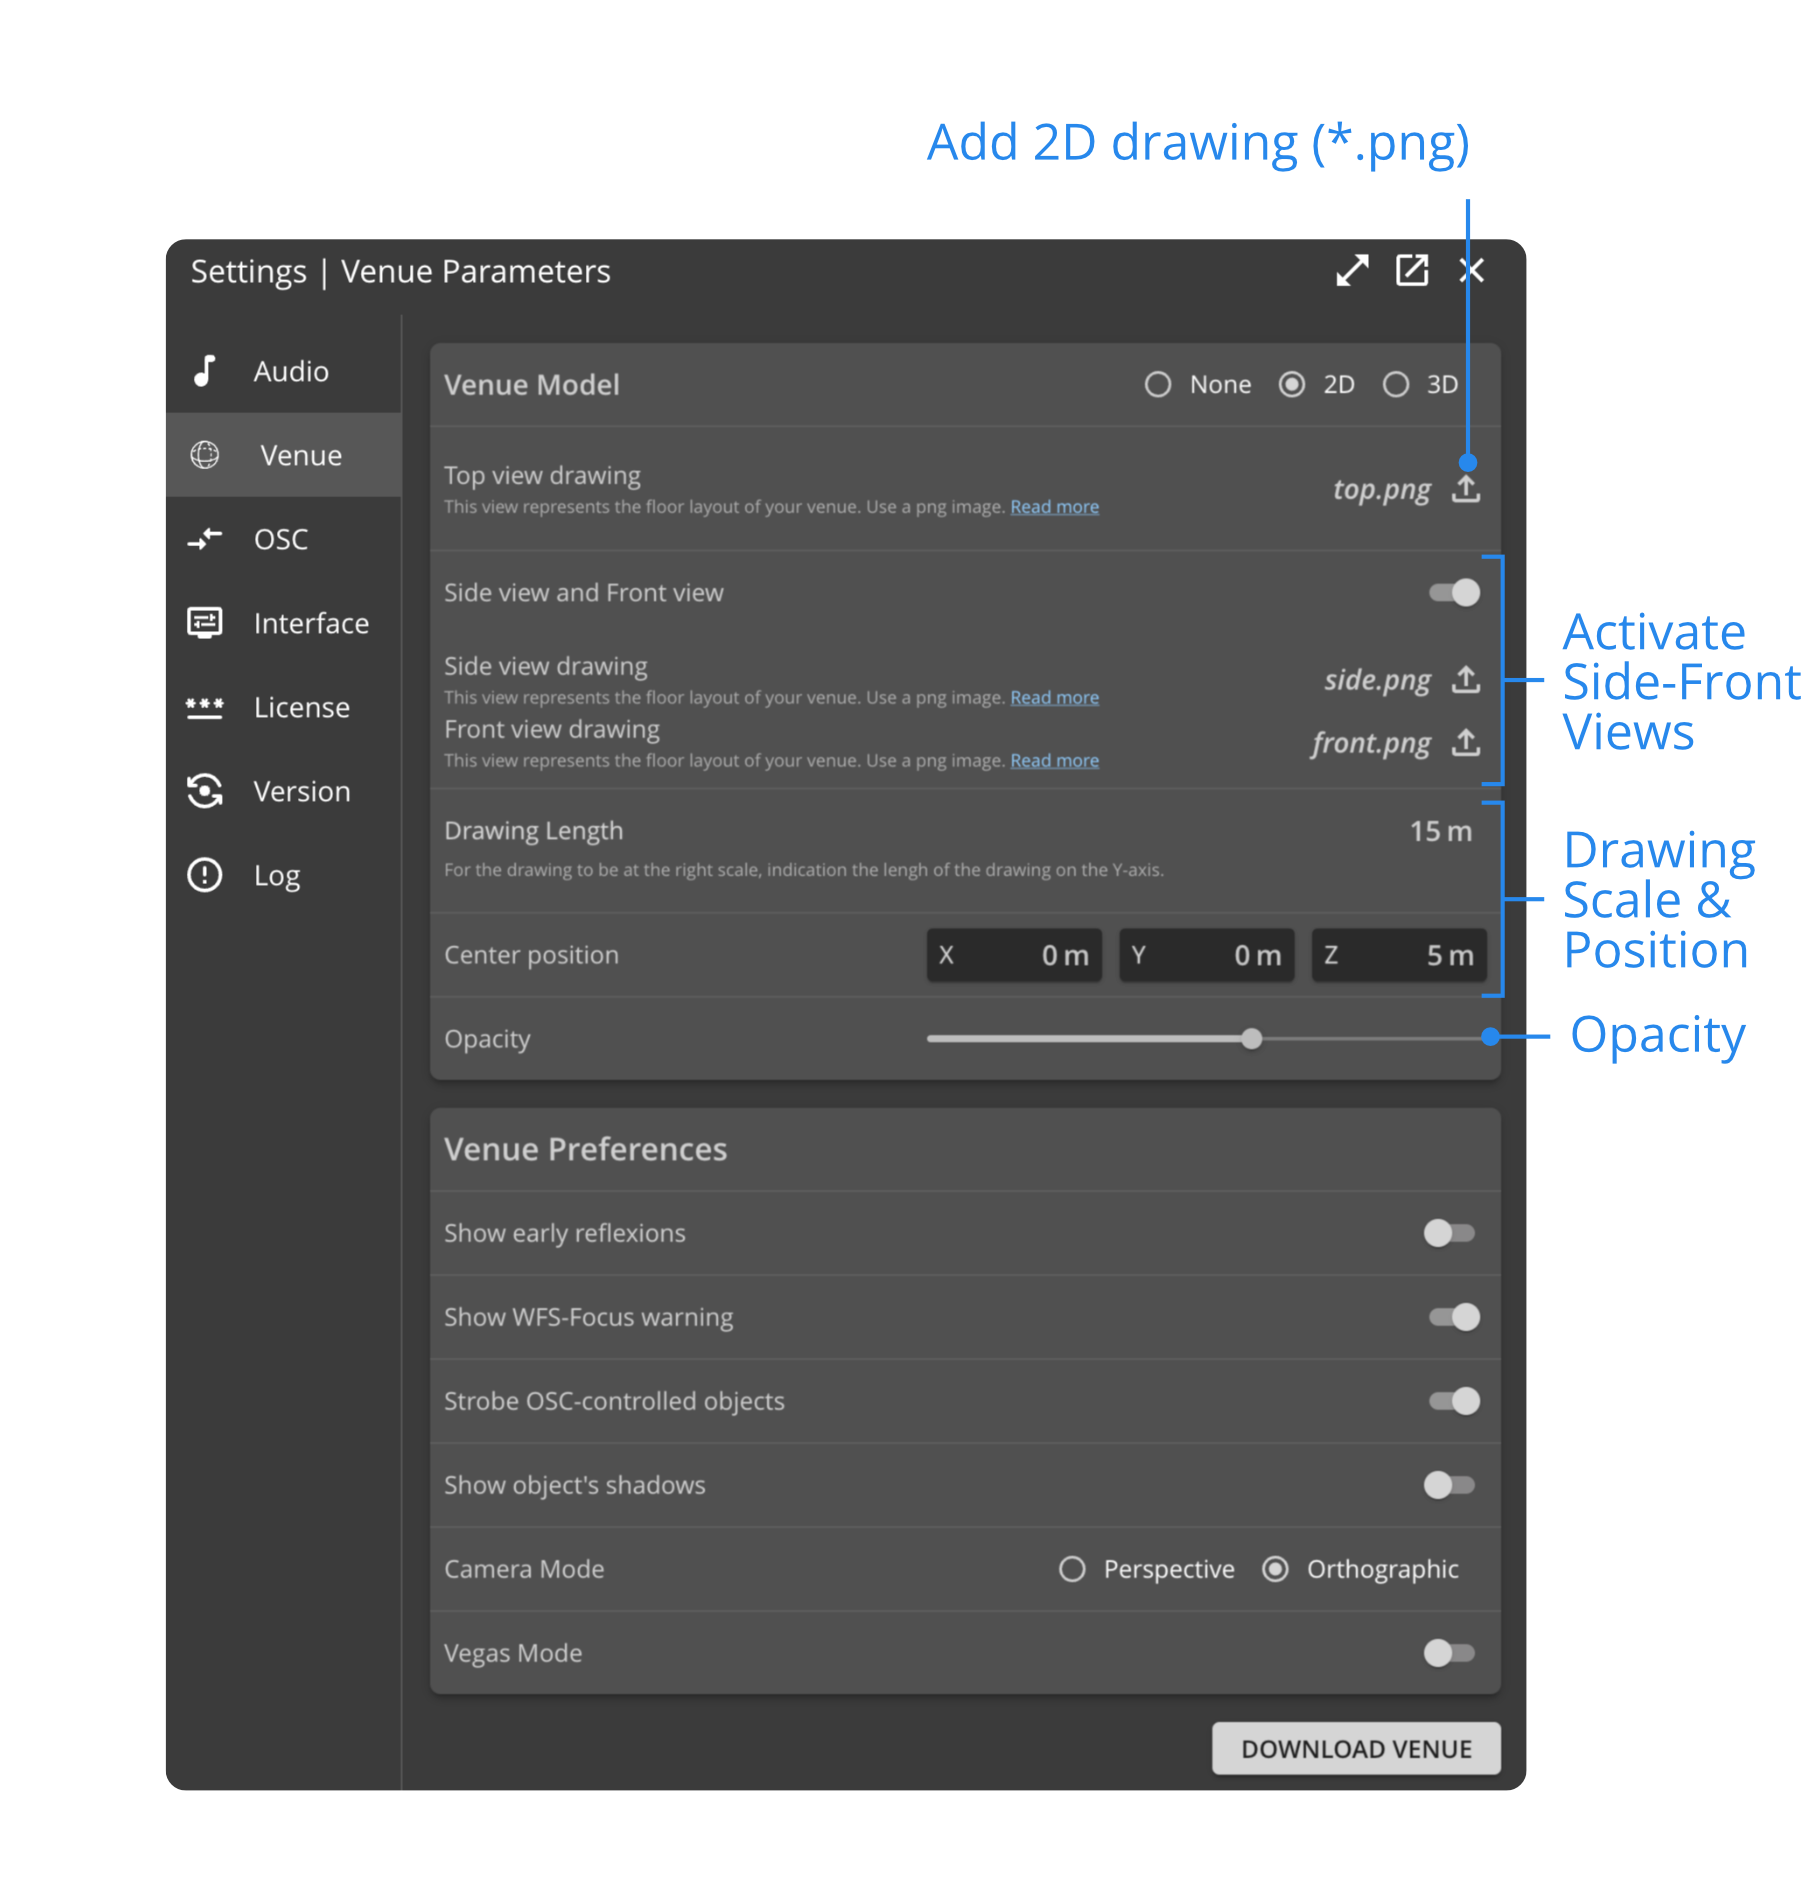
To import 3D Models or 2D Drawings, go to the "Venue Parameters" Menu, in "Settings | Venue Parameters". Then select "3D Model" or "2D Drawings" and import your file accordingly.
- 3D Model
- 2D Drawings
HOLOPHONIX allows you to import 3D models of your venue in the *.GLB file format (a compressed version of GLTF files). If you want to import files from a different format, such as *.DWG, you can use external tools to convert the file. You can use the software Blender, or the online tool Three.js.
After importing the file, adjust its scale (if necessary), and use the Rotation and Position settings to align the 3D Model in the 3D Venue.
Check our video tutorial on how to convert and import 3D Models in HOLOPHONIX.

HOLOPHONIX allows you to import 2D floor plans of your venue as an image in the *.PNG file format.
After importing the file, enter the Drawing's Length to adjust the image to the right scale in the Venue. Use the Center X, Center Y, Center Z settings to offset the positioning of the floor plans and align its center with the Venue's center.