Preset Setup
Audio Setup
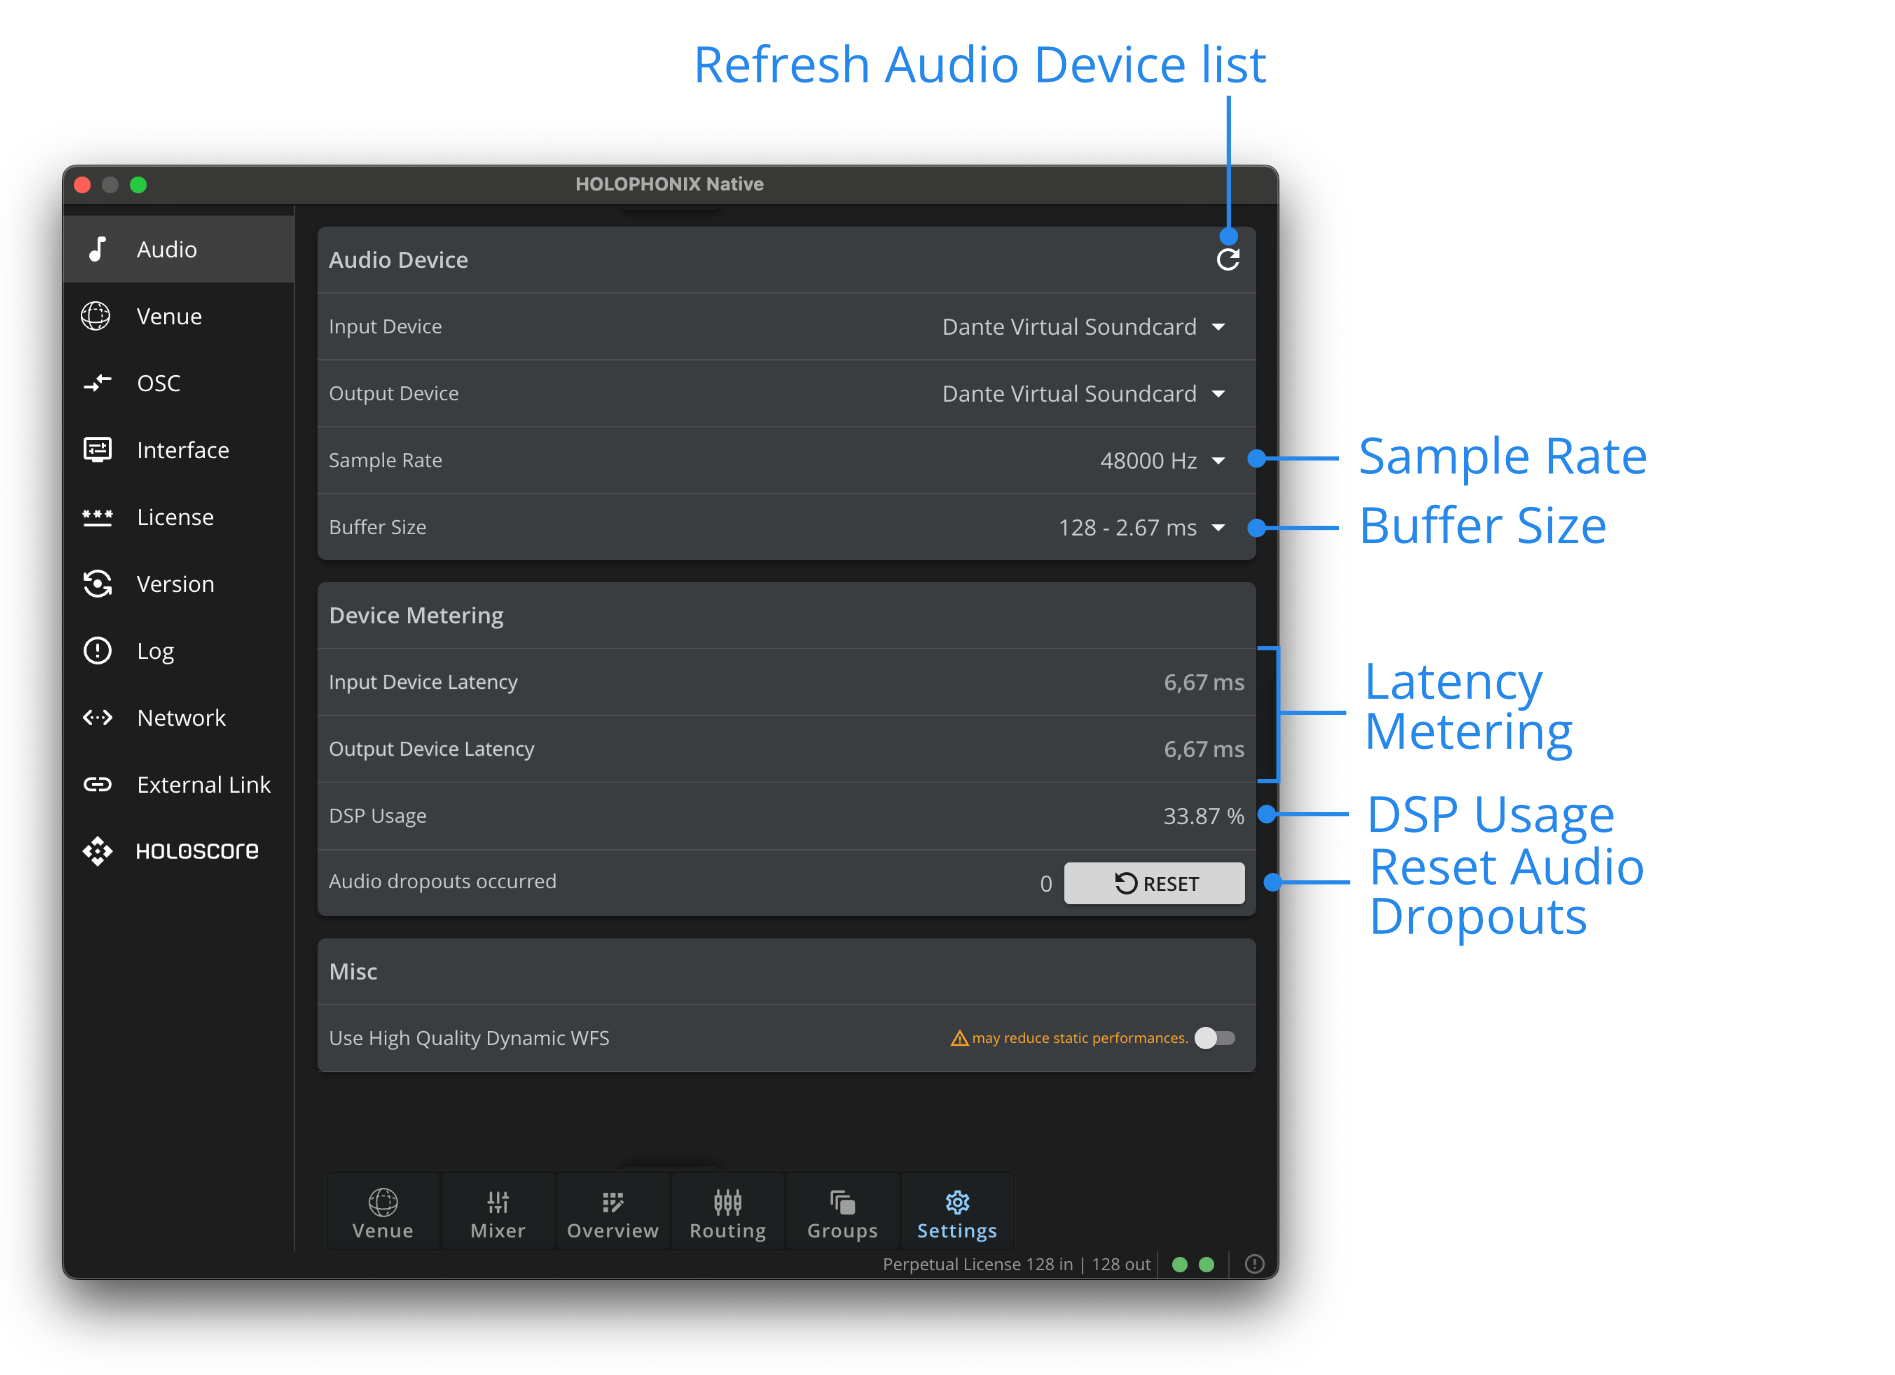
Open the Audio Settings: open the "Settings" window, and reach the "Audio" tab.
Audio Device & Sample Rate (HOLOPHONIX Native only)
When using HOLOPHONIX Native, choose which audio interface to use as input and output devices and adjust its Sample Rate. If the device does not appear in the list, it could be because the device has been plugged in after starting HOLOPHONIX Native. Click on the refresh button to update the devices list.
On a HOLOPHONIX Processor, you need to use the Dante Controller to change the Sample Rate.
Buffer Size
Adjust the Buffer Size. A lower Buffer Size will result in a lower audio latency, but will be more demanding on the CPU, whereas a higher Buffer Size will be less demanding on the CPU, but will increase the audio latency.
Speaker Setup
Create Speakers
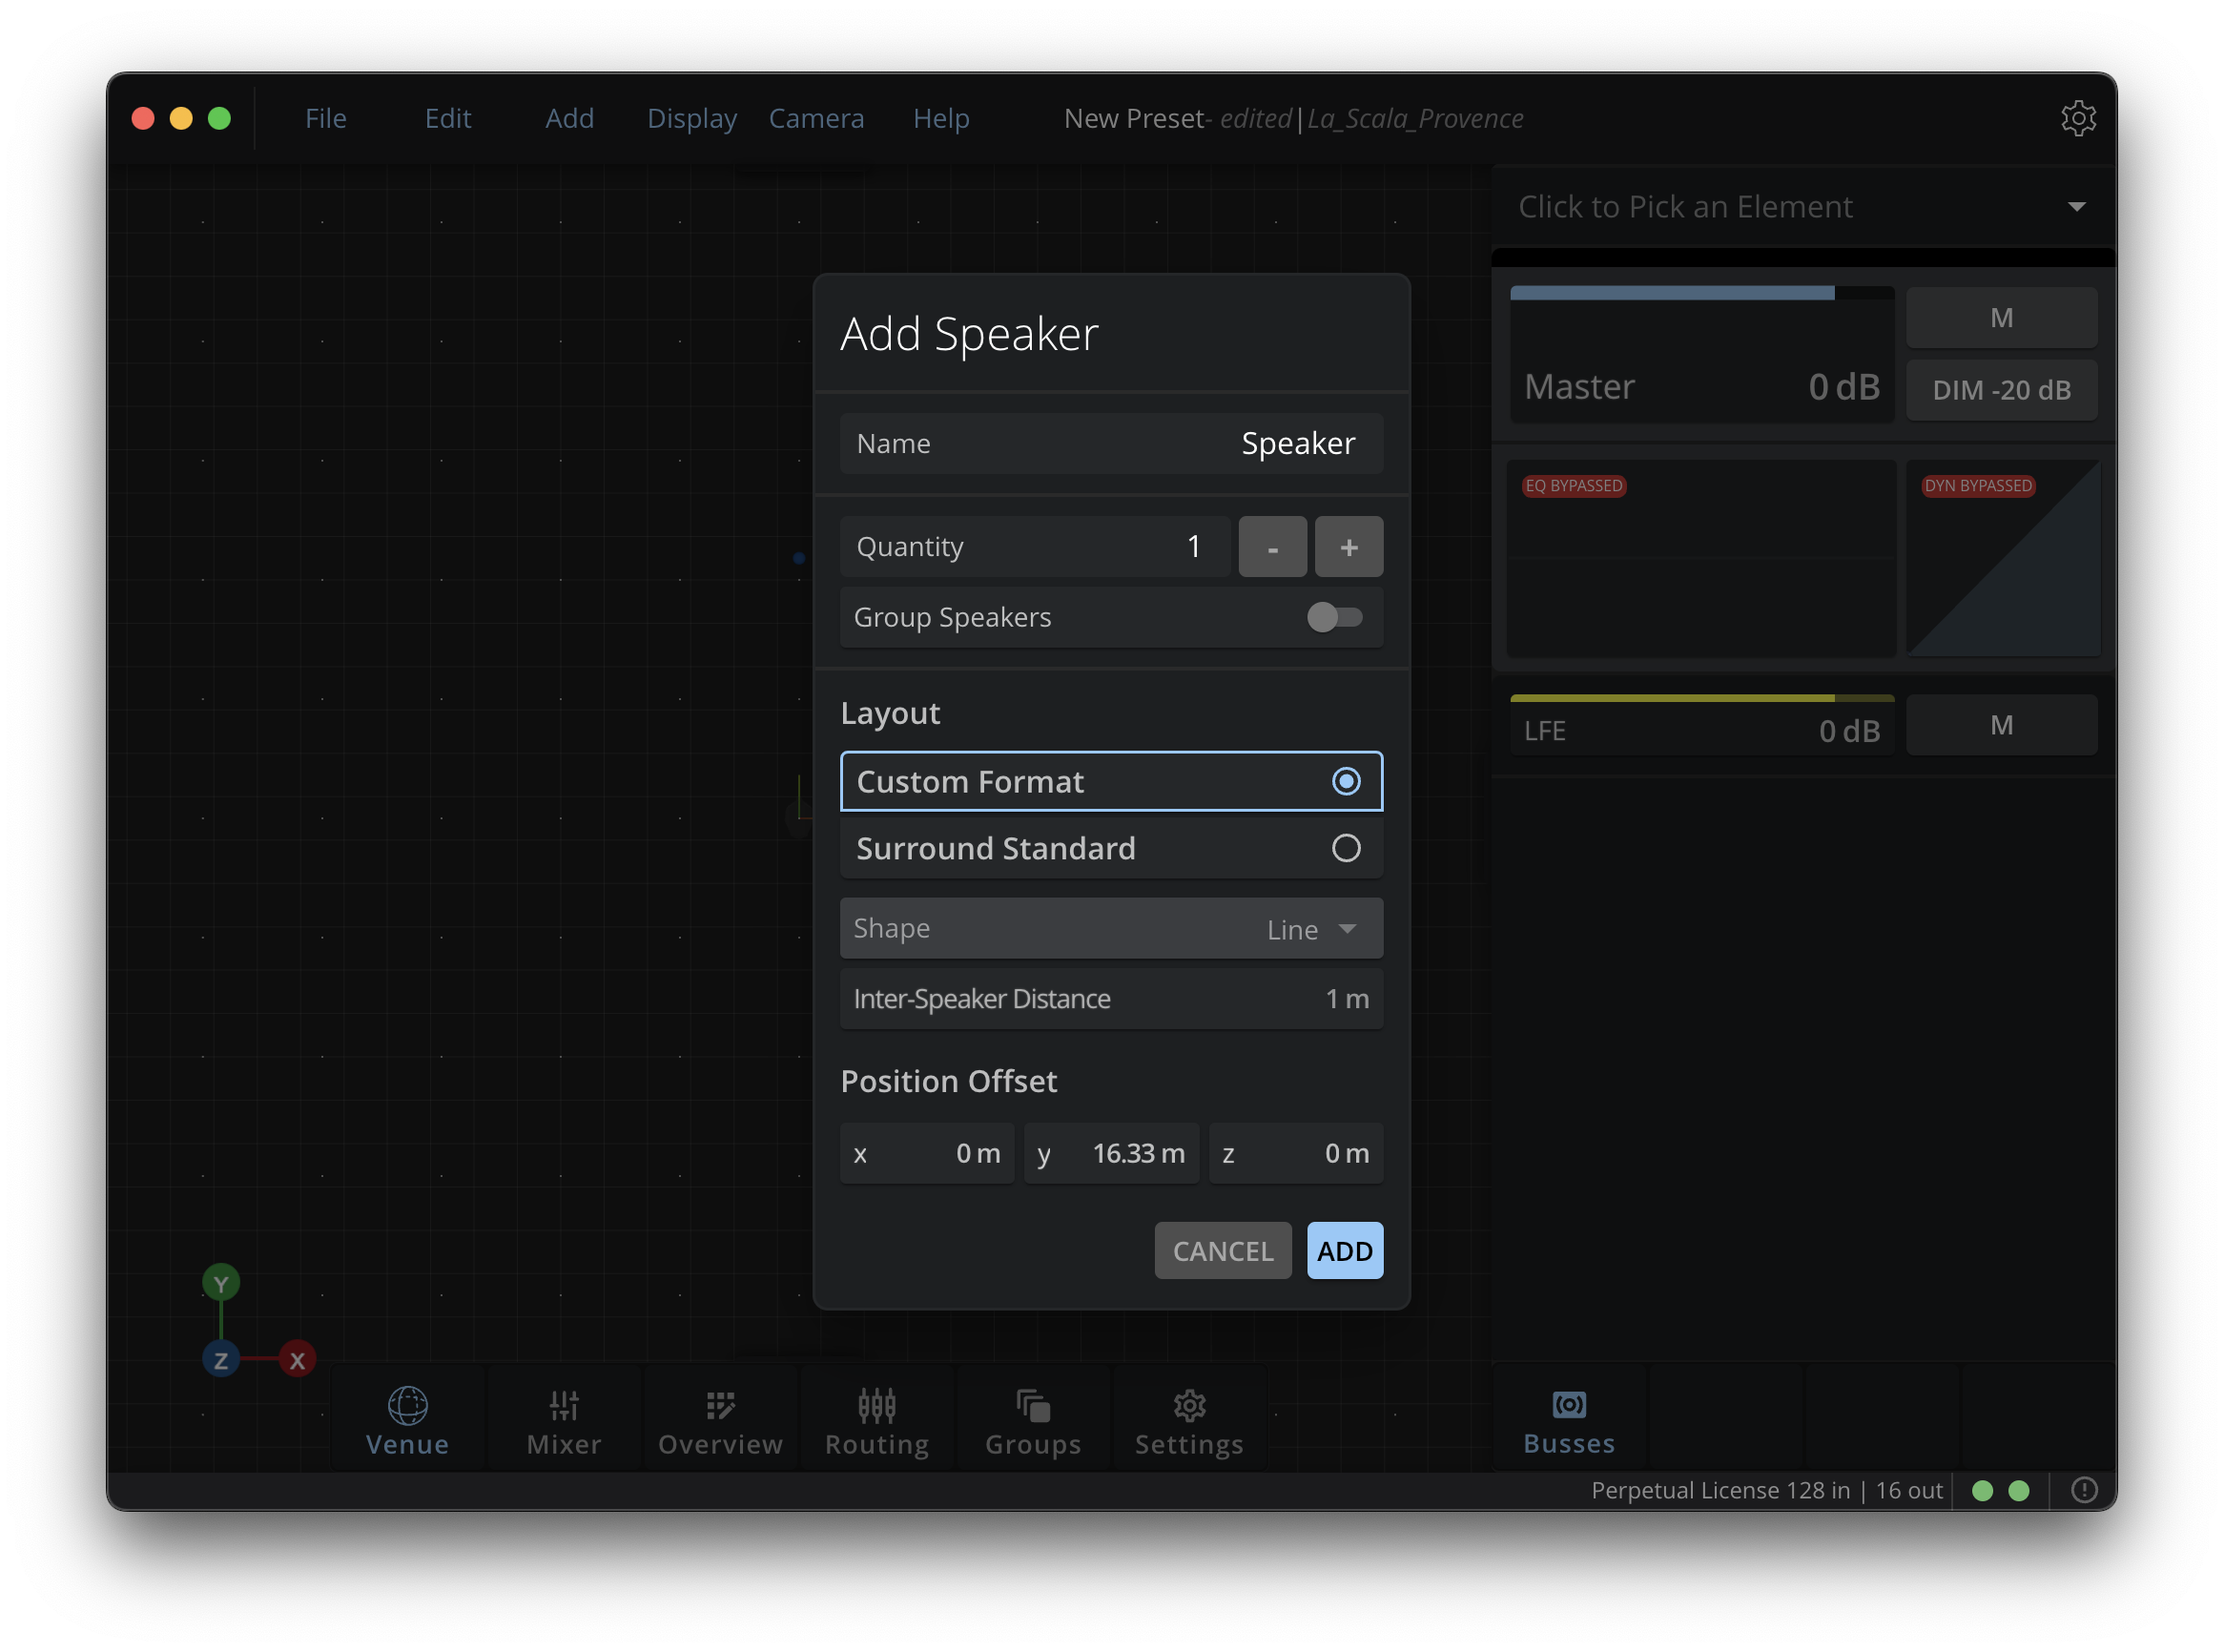
First, you need to add loudspeakers in HOLOPHONIX. Go to the "Add" menu, and click on "Add Speakers".
When adding multiple loudspeakers at once, you can group them directly in the "Add" menu. This will help later with routing. If you are not sure whether you need to group your speakers at creation or not, you can always edit the Speaker Groups later.
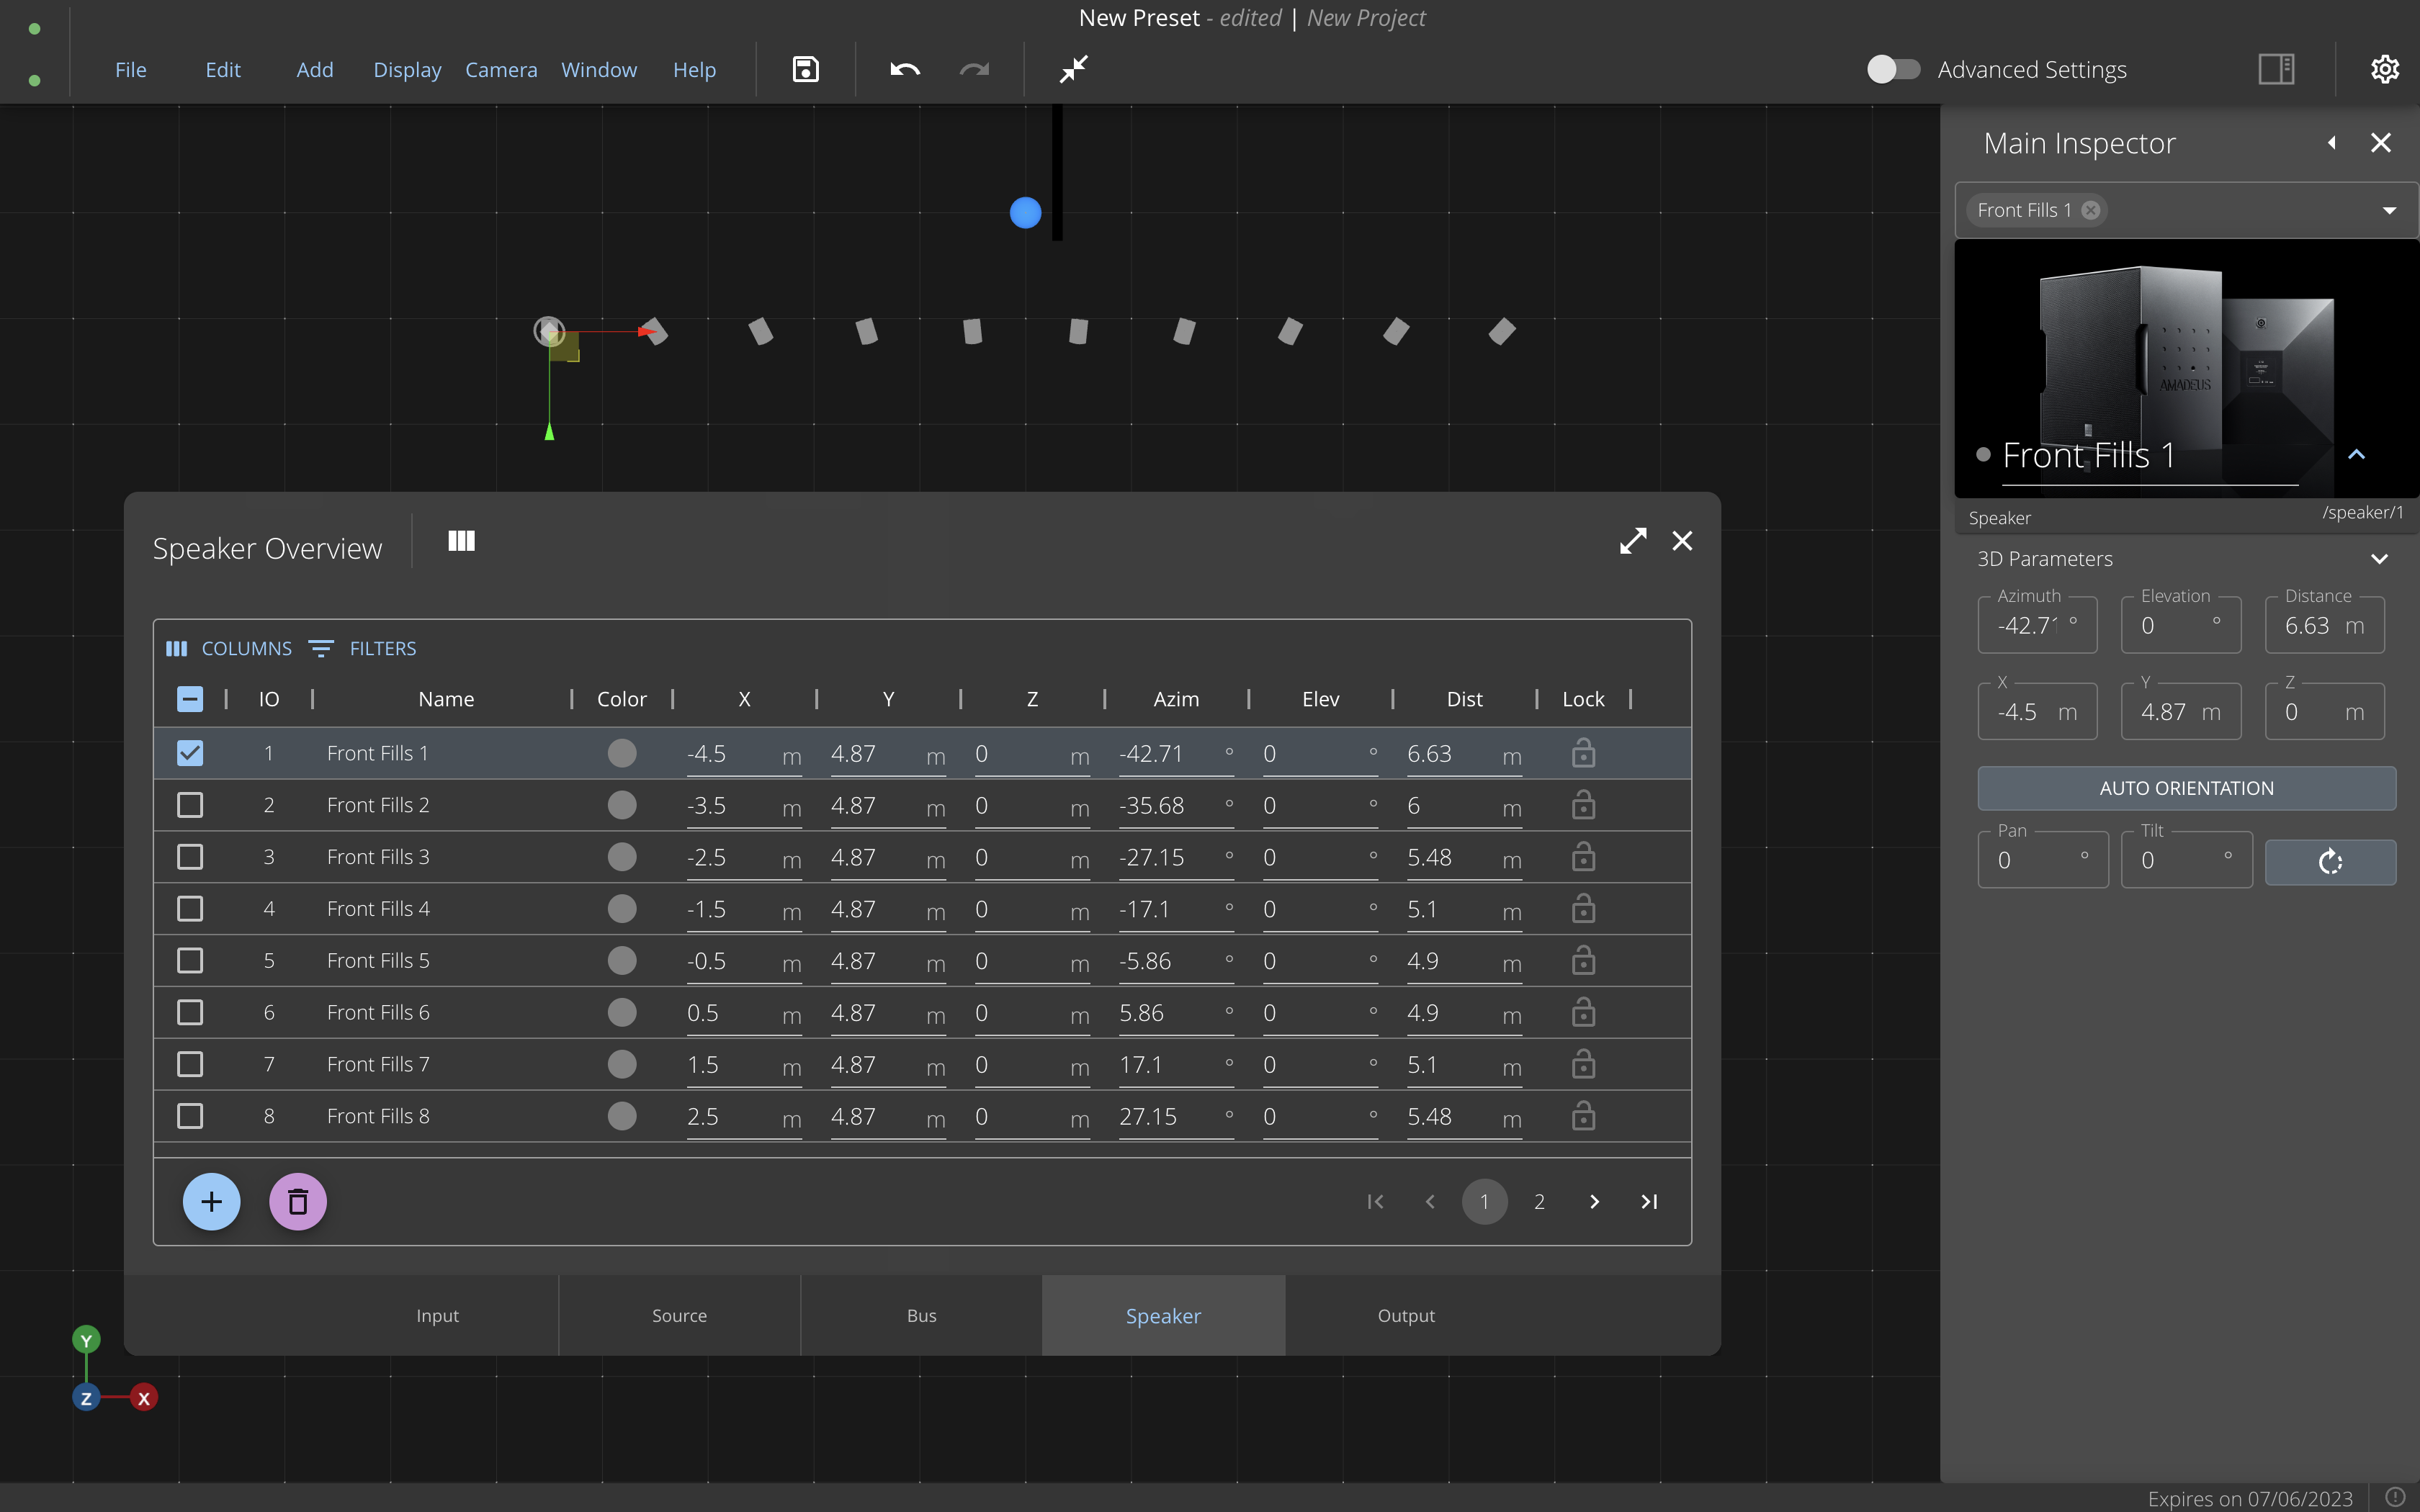
Speakers Position and Orientation
Position your speakers according to your studio or your venue layout. You can edit the speaker positions by moving them in the Venue View, or by entering their coordinates in the Inspector. However, the most convenient way is to use the "Overview" window (from the Dock, or with the keyboard shortcut Ctrl + Shift + G).
If you plan on working with the Wave Field Synthesis algorithm, you will also need to adjust the Speakers' orientation.
Speakers Routing
Finally, open the Routing window (from the Dock, or with the keyboard shortcut Ctrl + Shift + R), and select the "Output" tab to assign the speakers to hardware audio outputs.
Bus Setup
You will now need to create and set up one or multiple spatialization buses.
Create Bus
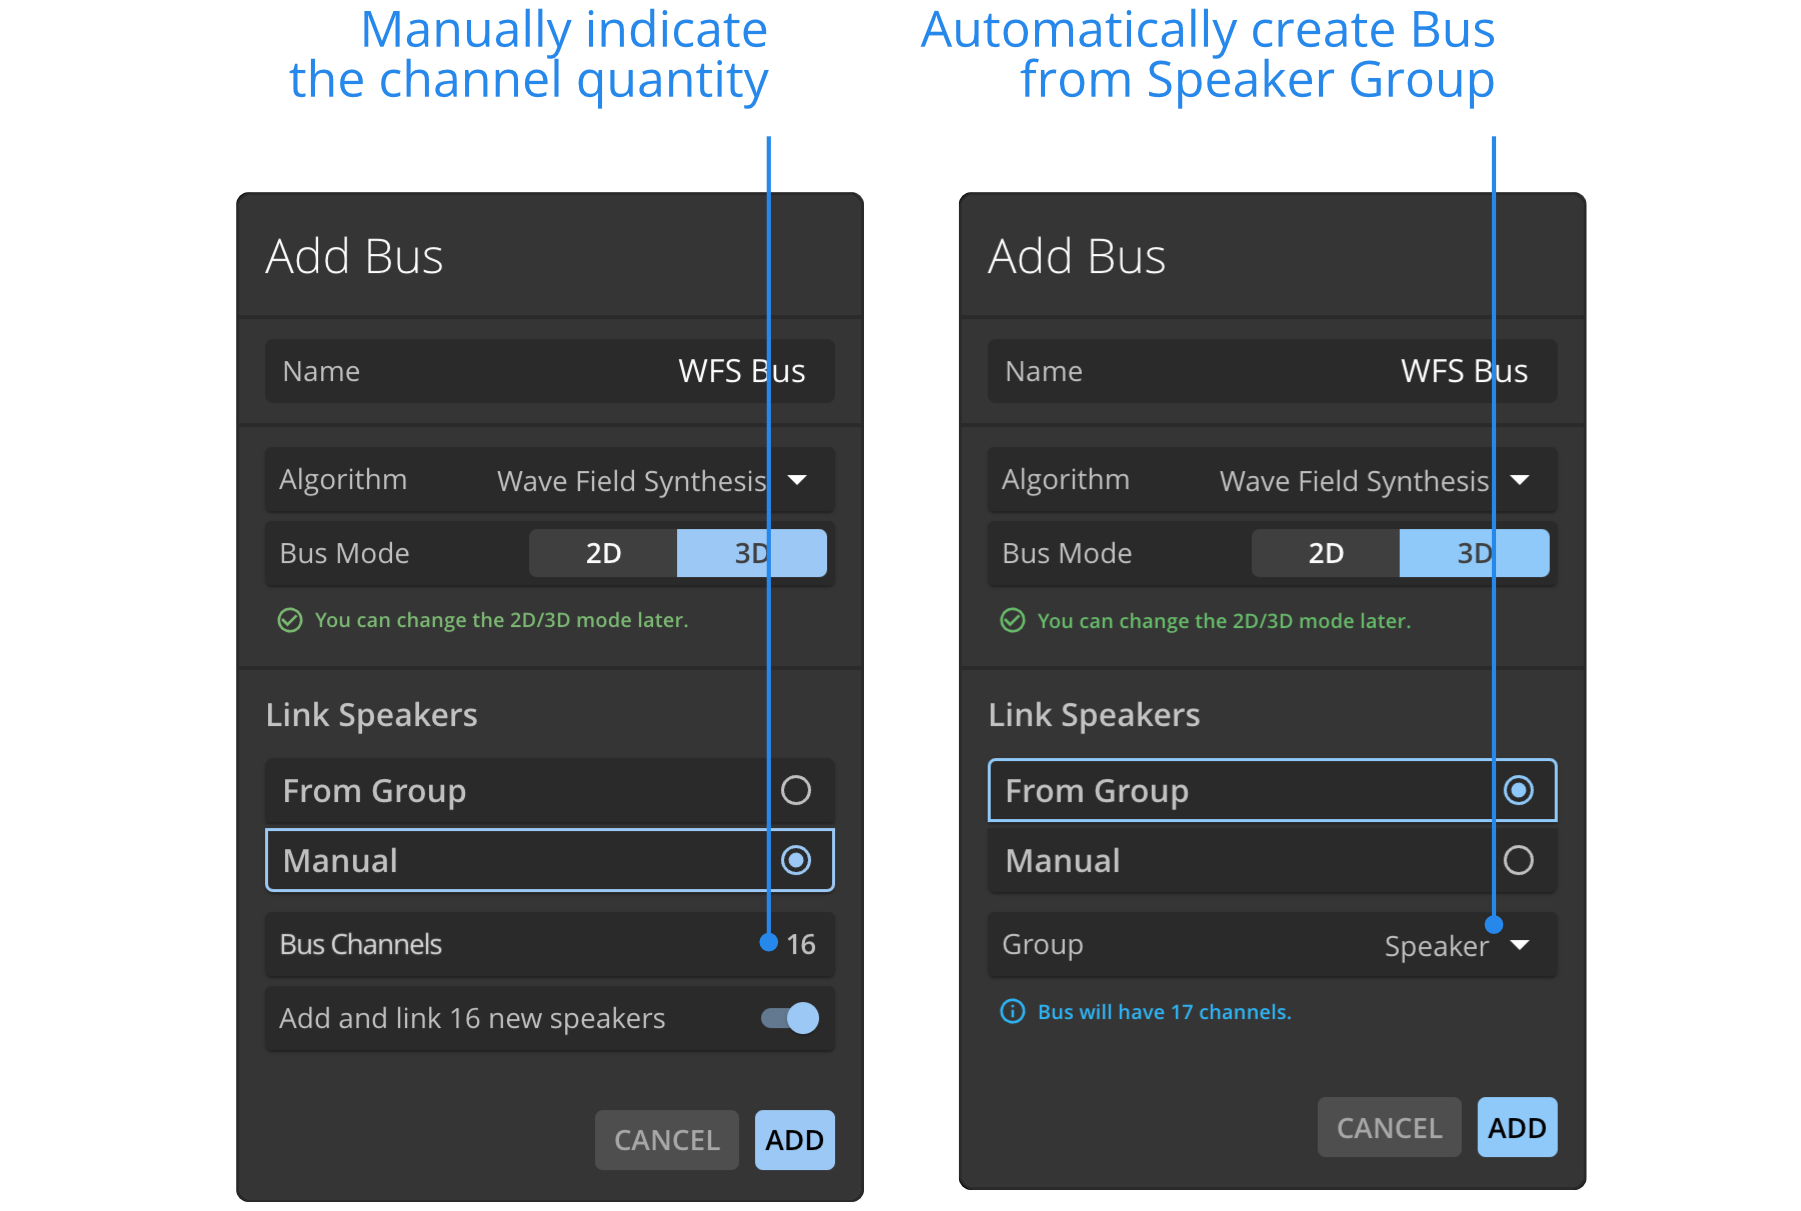
Go to the "Add" menu, and click on "Add Bus". Choose the spatialization algorithm that most fits your setup. If you have any doubt on which algorithm to use, or how to set them up, visit the Spatialization Bus section. We usually recommend using the WFS algorithm for live sound.
If you have created Speaker Groups, you can select your Group during the bus creation process. This will automatically adjust the number of channels of the bus, and will assign the Bus Outputs to the Speakers.
With Manual mode, enter the Number of Channels of your bus (corresponding to the number of loudspeakers that you will assign to the bus).
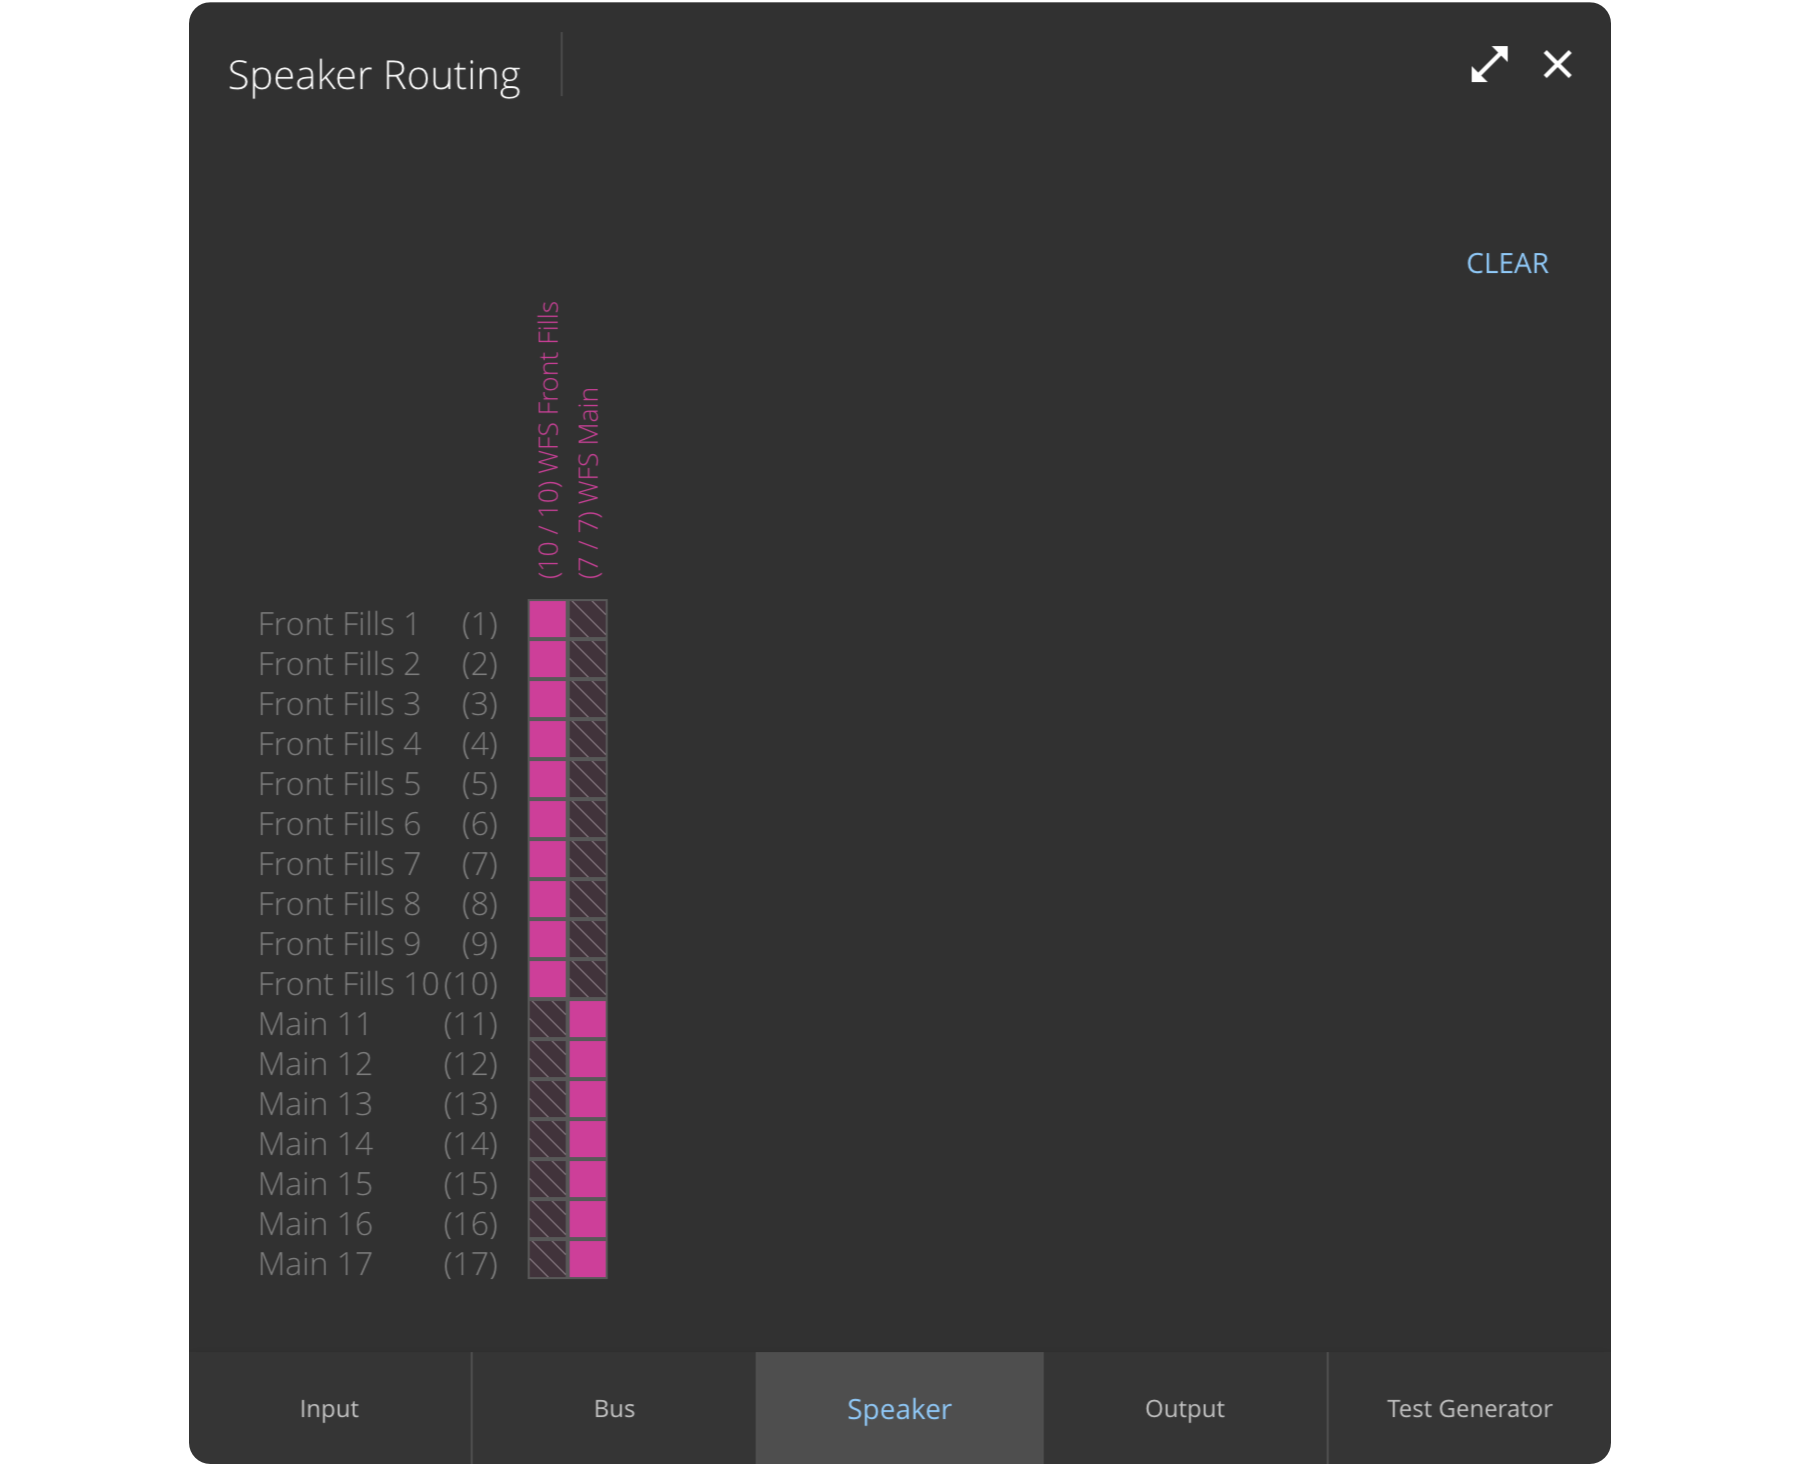
Bus Routing
Open the Routing window (from the Dock, or with the keyboard shortcut Ctrl + Shift + R), and select the "Speaker" tab to assign speakers to the bus.
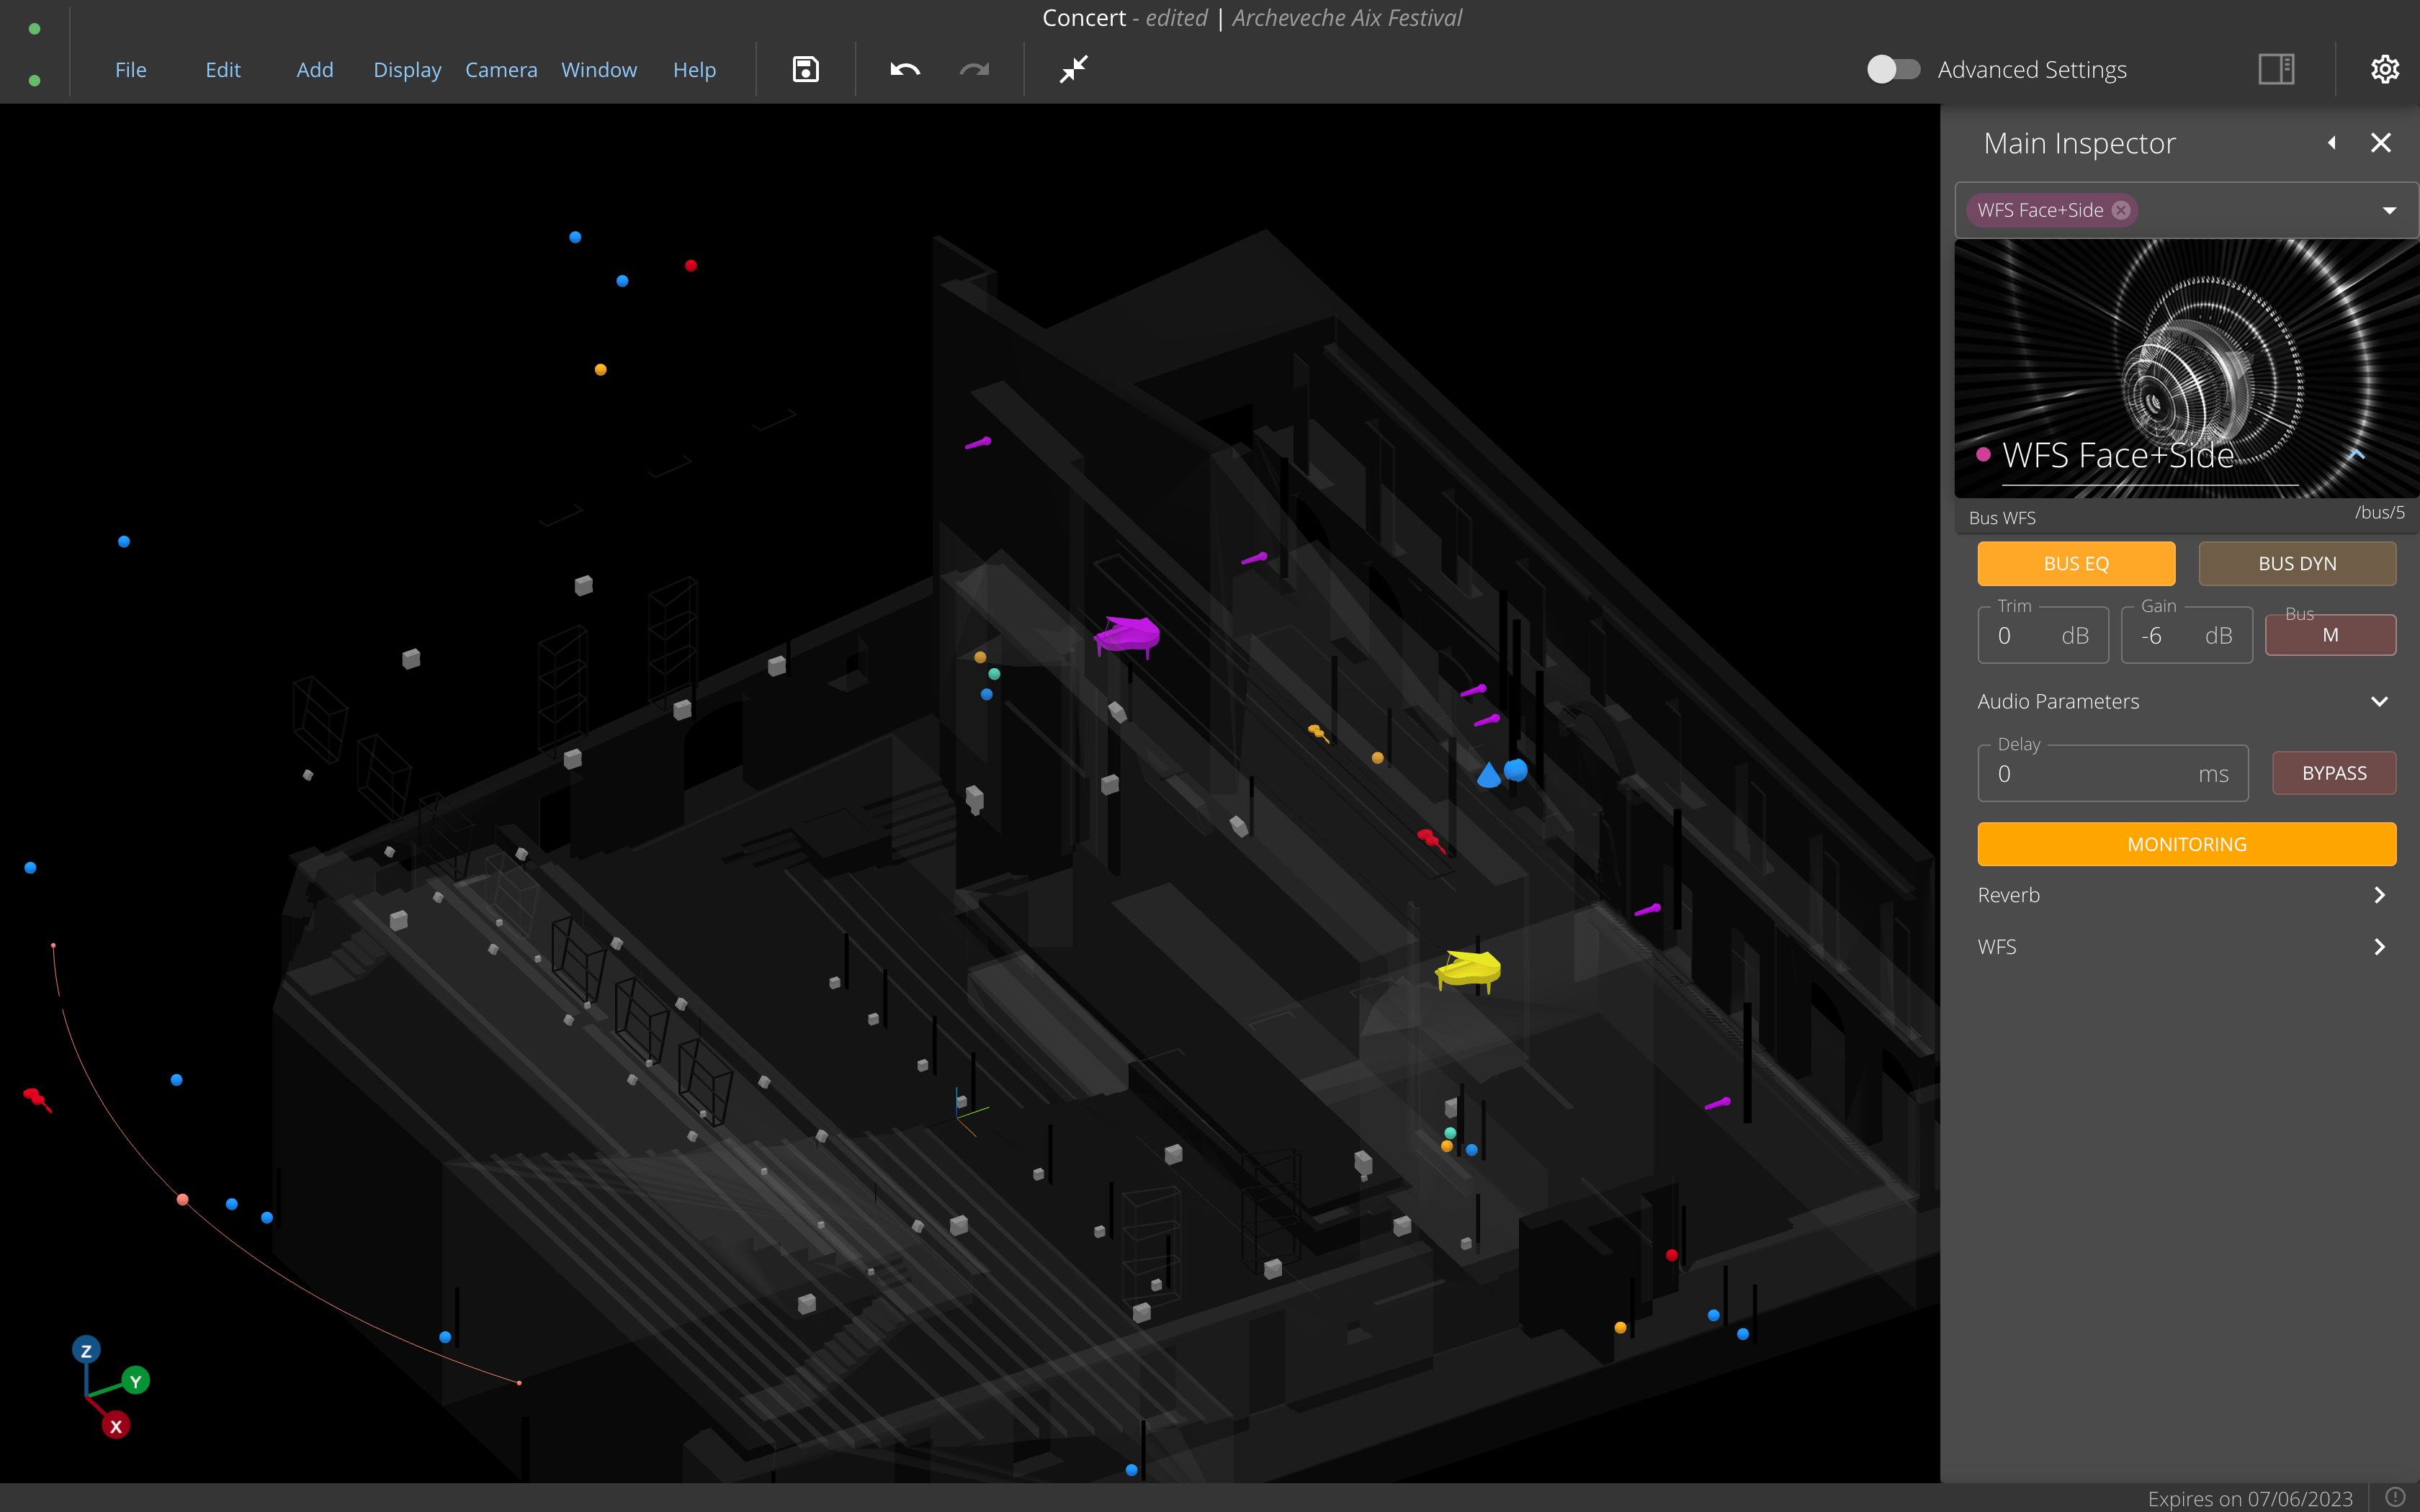
Adjust Bus Settings
Finally, adjust the bus settings from the inspector.
Sources Setup
Create Sources
Go to the "Add" menu, and click on "Add Source". Choose the Source Family and Source Type to create. Most of the time, you will be using Mono virtual sources.
Input Routing
Open the Routing window (from the Dock, or with the keyboard shortcut Ctrl + Shift + R), and select the "Input" tab to assign audio hardware inputs to the sources.
Sources to Bus Routing
In the "Bus" tab assign the sources to a spatialization bus. You can route one virtual source to up to six buses.
Binaural Monitoring
The monitoring bus offers a 3D rendering of the spatialization buses, through headphones, using the binaural algorithm.
Unlike standard binaural buses, the monitoring bus doesn't spatialize the sources in binaural, but instead spatialize the algorithm's loudspeakers.
With Binaural Monitoring, you can monitor any spatialization bus. This allows you to work on a spatialization project with your headphones only. To listen to the 3D binaural rendering of a bus, click on 'MONITORING' in the desired bus page. Several buses can be monitored at the same time.
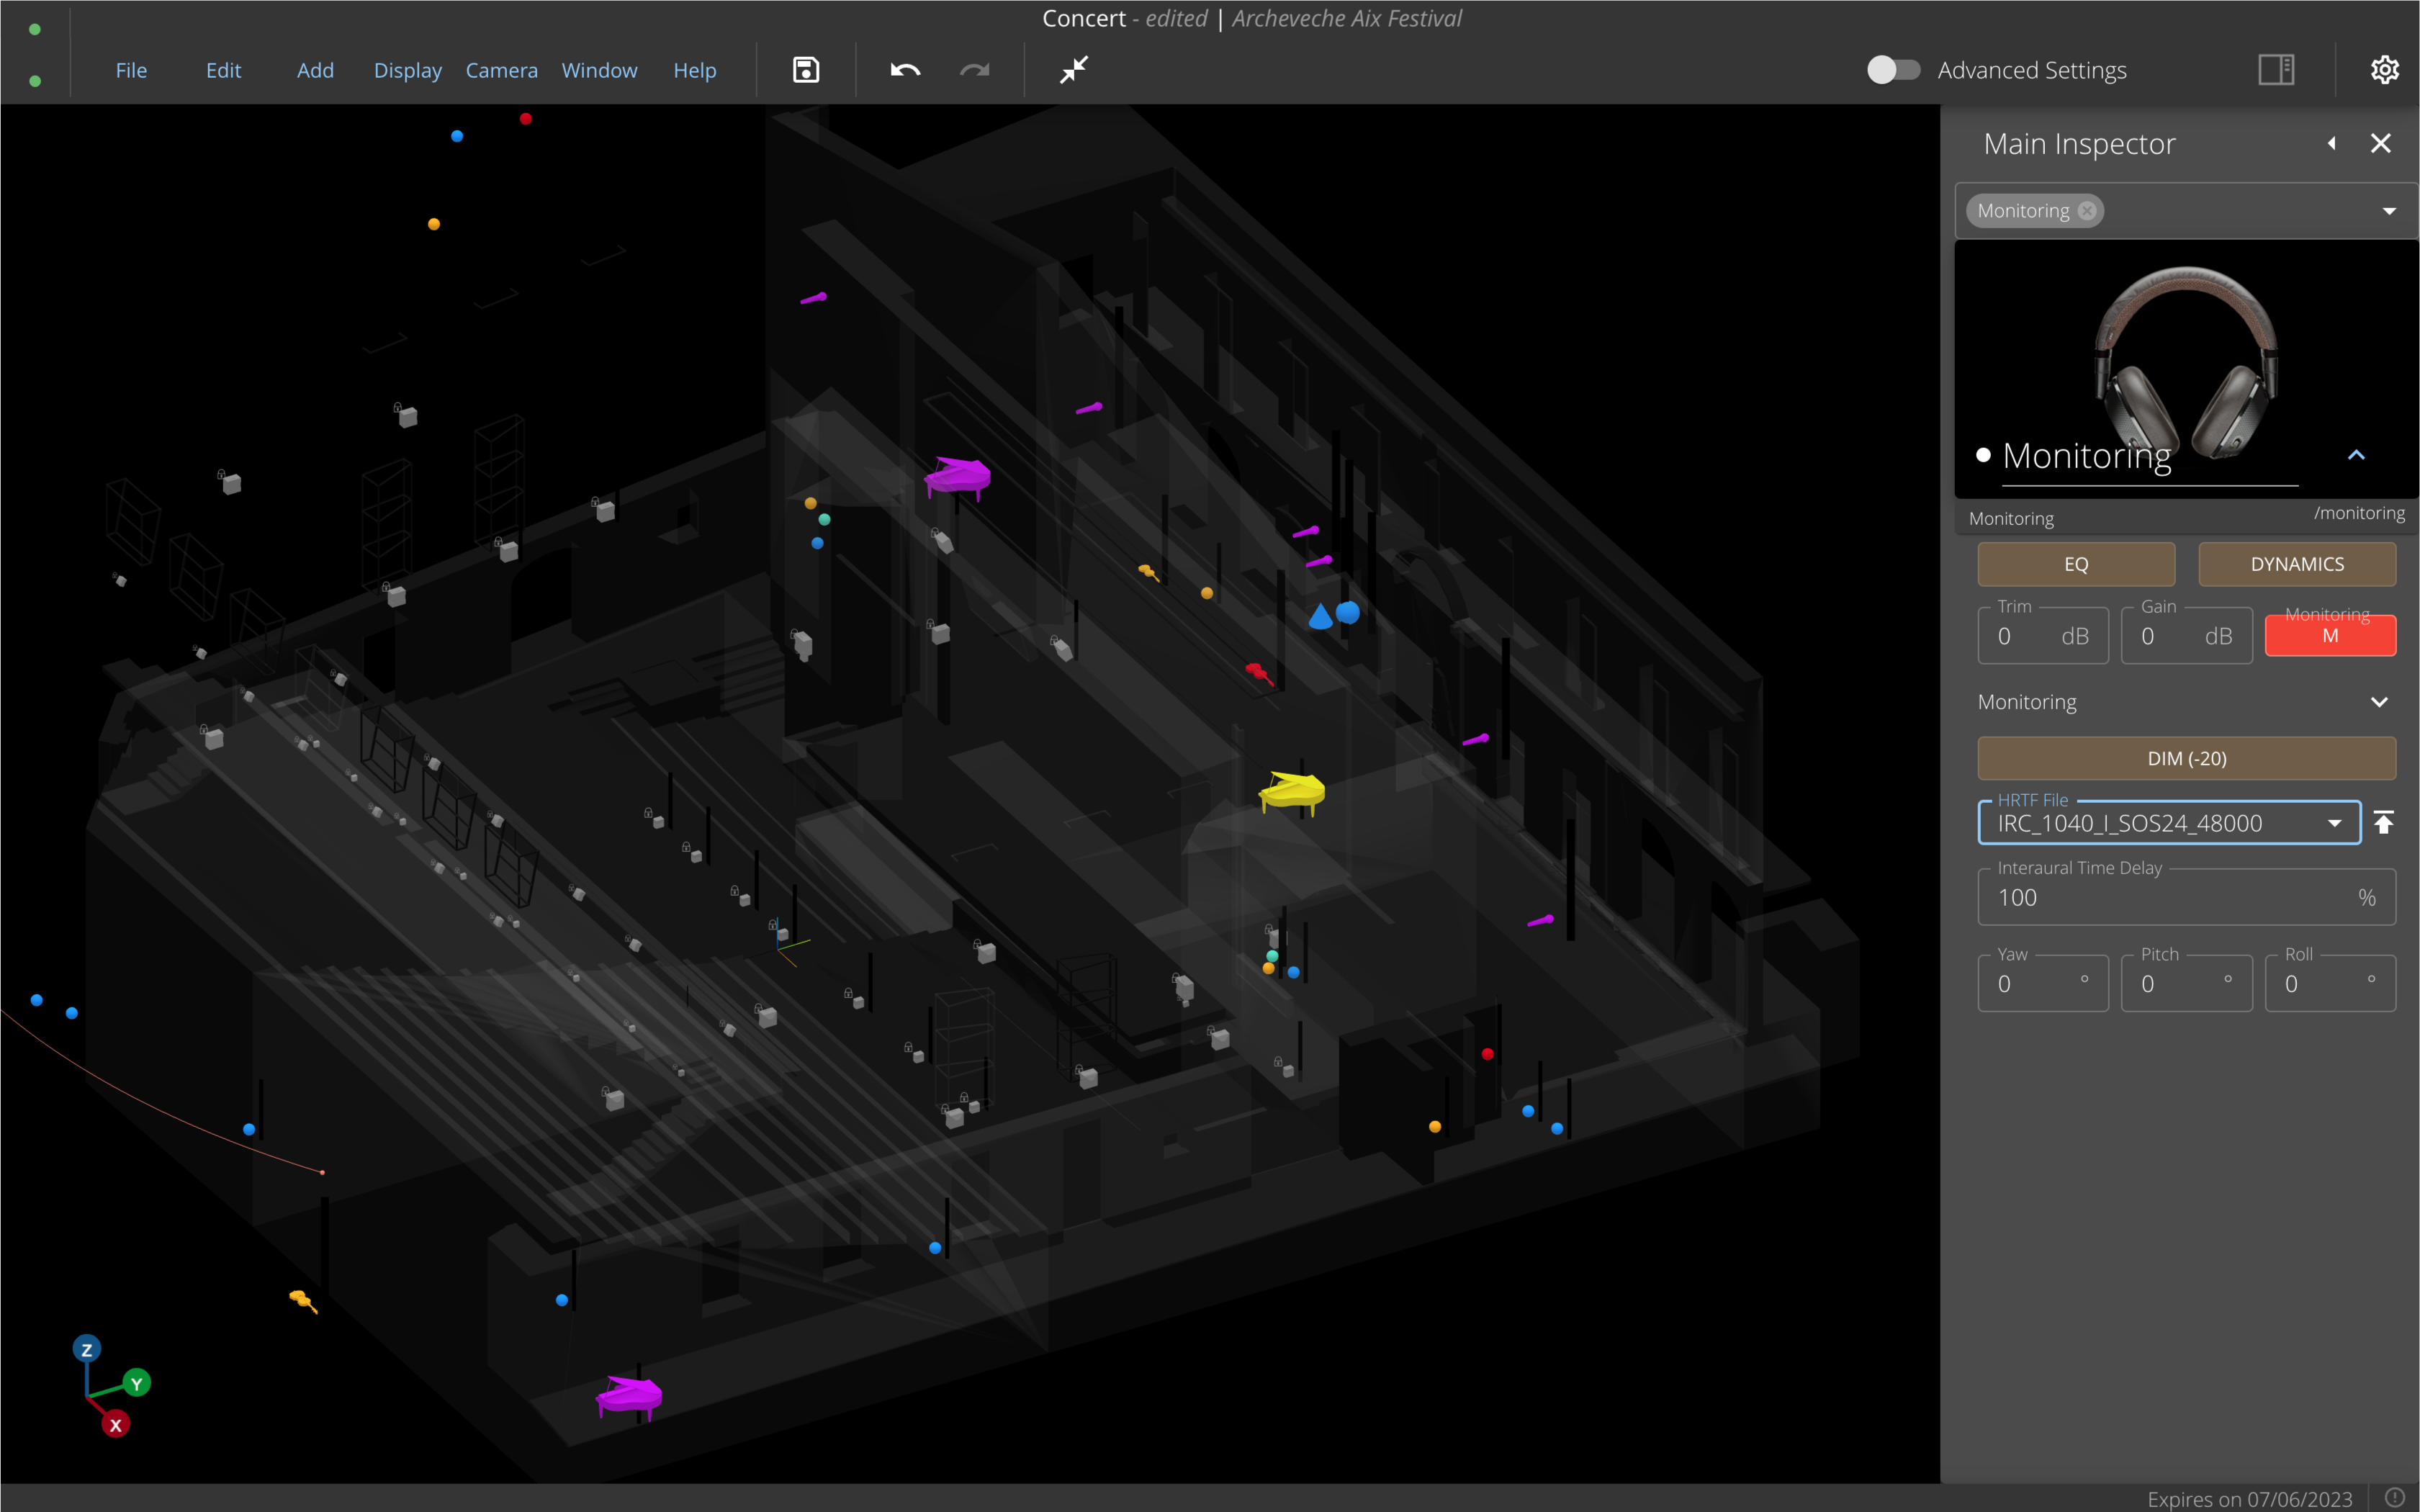
Monitoring Setup
From the inspector, select the Monitoring bus and choose an HRTF file. You can import your own HRTF file with the import icon. The file will be uploaded into the project. You will be able to use this HRTF file from any preset in that project.
Monitoring Routing
Open the Routing window (from the Dock, or with the keyboard shortcut Ctrl + Shift + R), and select the "Output". Assign the monitoring outputs to the audio outputs corresponding to your headphones.
Start Monitoring a Bus
To monitor a Bus, select it in the inspector and activate the Monitoring button in the "Audio Parameters" section.