Hardware Setup
Overview
The HOLOPHONIX processor relies on networks to operate:
- Dante® network for audio ;
- a web-based control interface that can be accessed on a local network.
Before connecting your processor to your Dante® and Control networks, you need to ensure it has the proper network configuration. By default, the HOLOPHONIX processor's network ports have the following configuration:
- Remote Port: Static IP Address 100.100.100.100, Subnet: 255.255.255.0
- Dante® Primary: Automatic IP (DHCP/Link-Local)
- Dante® Secondary: Automatic IP (DHCP/Link-Local).
If you want to configure the processor's Control and/or Dante IP addresses to a different setting, follow the instructions below.
Recommended Network Configuration
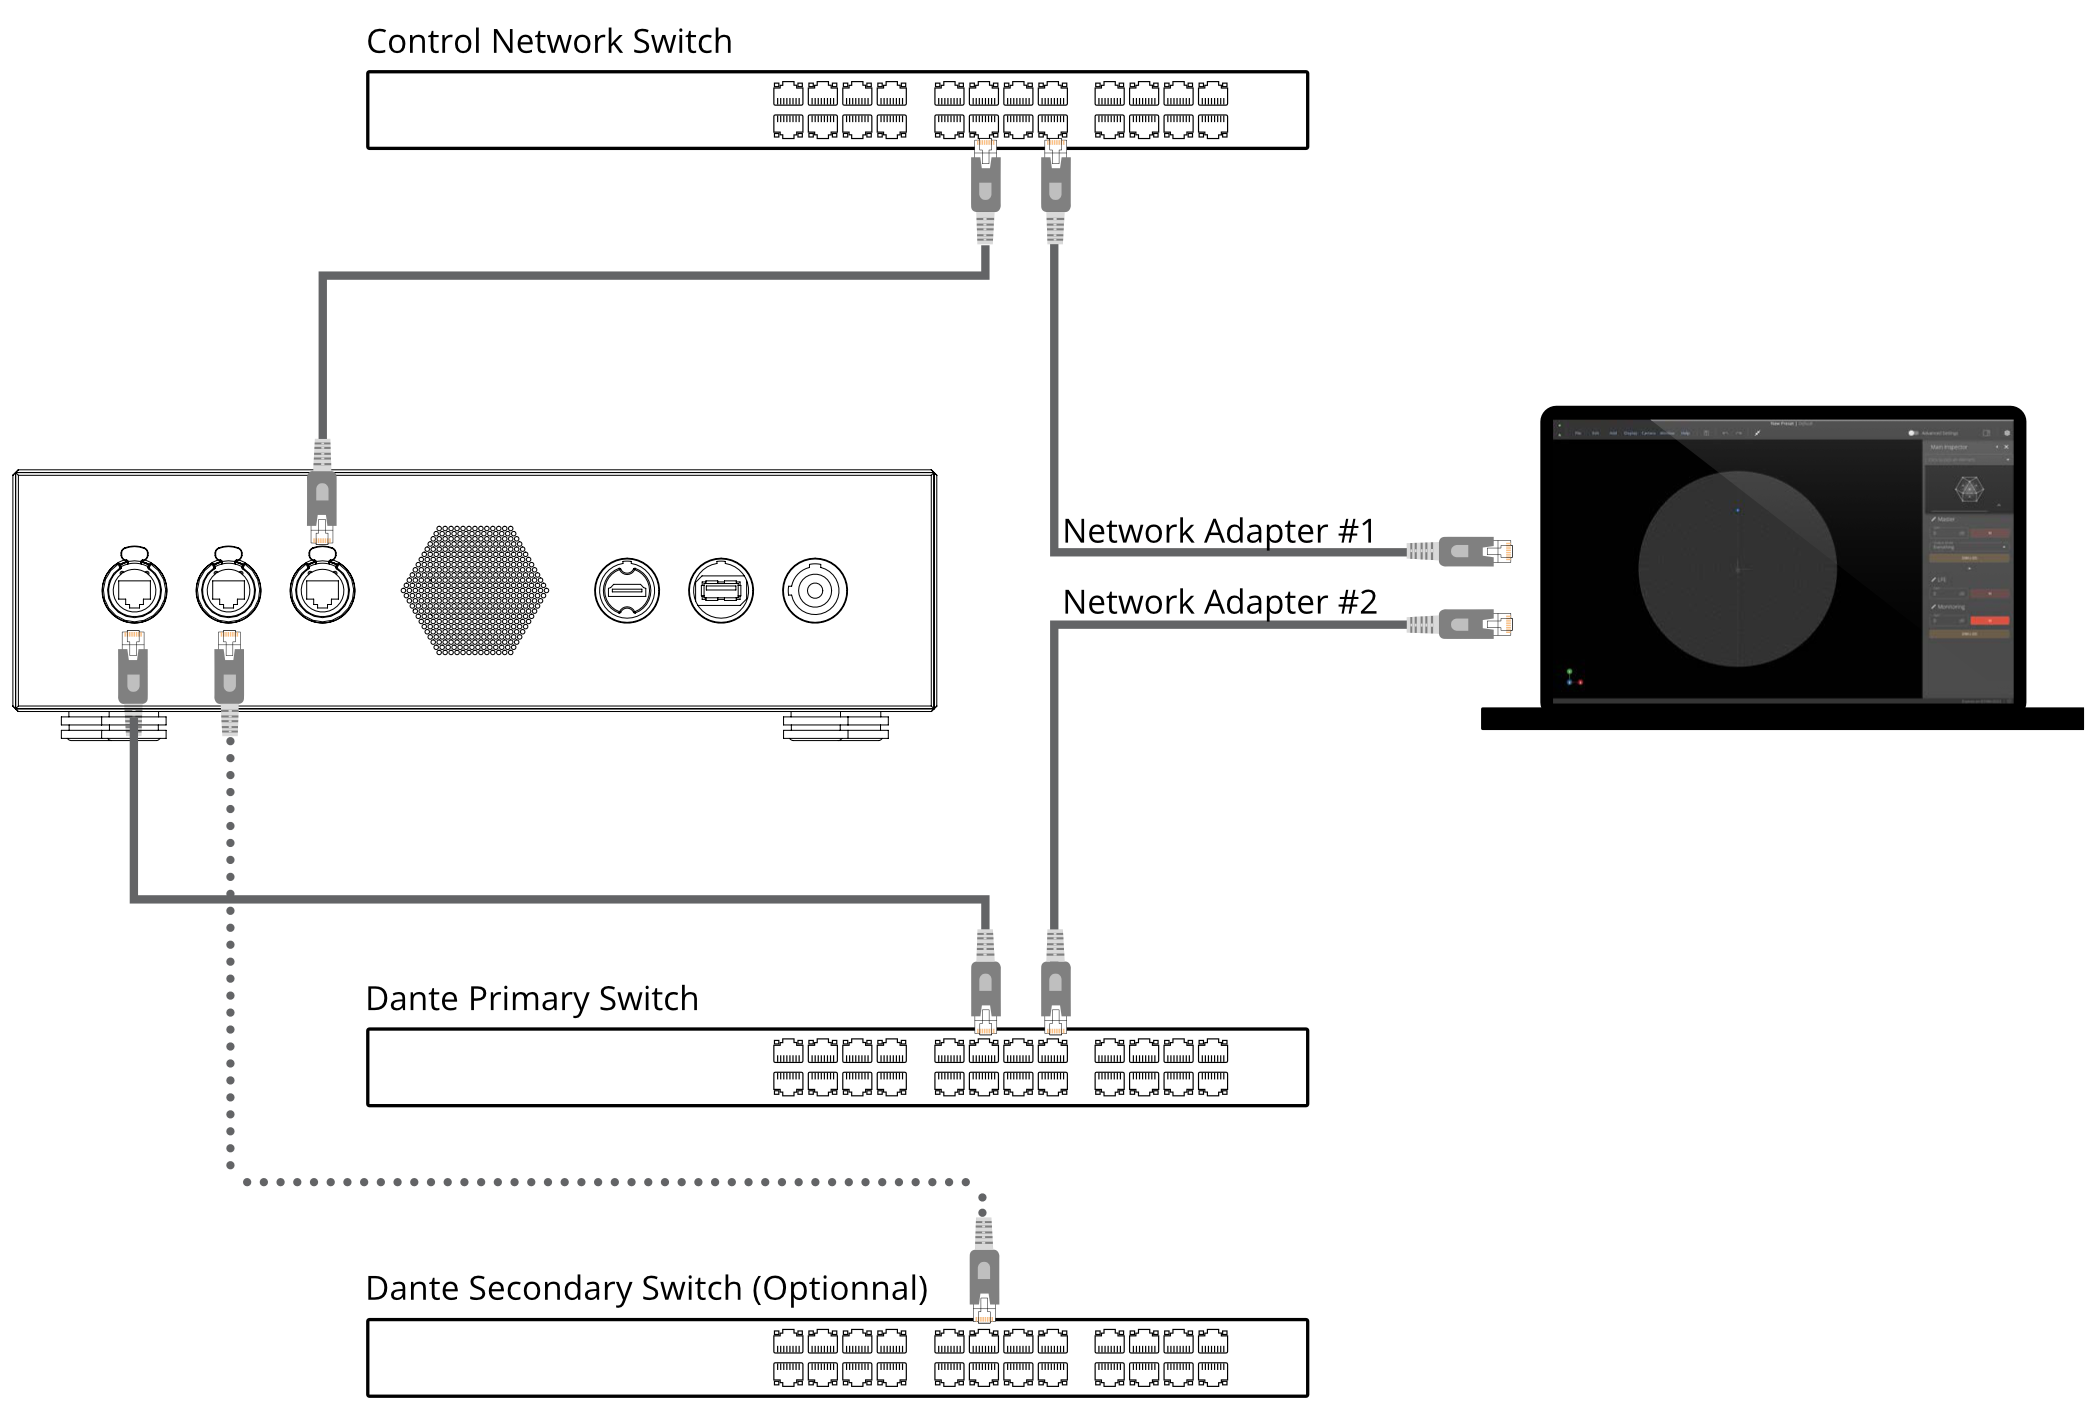
The Remote port, Dante® Primary and Dante® Secondary ports need to be connected to three different networks. If you are using a single network switch, configure VLANs (Virtual Local Area Networks) on the switch.
Connecting the Remote port in a Dante® network can overload the network and cause important latency issues.
Initial Setup
-
Please follow the instructions in this section before connecting your HOLOPHONIX processor to your Dante® and Control networks.
-
For the following steps, you will need a computer (Mac or PC) for remote control of the HOLOPHONIX processor and for the Dante® network configuration.
-
Prior to any operation, make sure to:
- install the latest version of Dante® Controller software available at www.audinate.com to set up your audio network.
- install a chrome-based web browser (such as Google Chrome or Microsoft Edge) to control your HOLOPHONIX processor.
IP Address Setup
Connecting to the interface for the first time
- Connect your computer directly to the Remote port of the HOLOPHONIX Processor
- Set your computer's IP Address to the 100.100.100.X IP range (for example 100.100.100.101)
- Open chrome-based web browser (such as Google Chrome or Microsoft Edge)
- Type the URL:
holophonix.local/
Open Network Settings tab
Open the Settings window, then click on the Network tab. From that window you will configure:
- The Remote Control network port
- The Dante network ports (only for Generation 2 processors).
Adjust Network Settings
- Select the Network interface you want to configure,
- Choose between Automatic IP addressing (DHCP) or Manual IP addressing (Static)
- In Static mode enter the IP and subnet mask
- Click on Set to apply the new settings
To configure a network port, it needs to be connected to a network, or it won't appear in the 'Network interfaces' list.
When changing the IP range of the Remote port, you will be disconnected from the remote control interface. You will have to change the IP Address of your computer.
Connect HOLOPHONIX
Now that your IP Addresses are configured, you can plug your HOLOPHONIX processor to your Dante Primary, Dante Secondary, and Remote control networks.
Dante Setup
The configuration of the Dante® card must be performed with Dante® Controller software on an external computer.
- On your computer, make sure you are connected to the Dante® Primary Network.
- In the Dante® Controller, click on the 'DEVICE' menu, then select 'DEVICE VIEW'
- Choose HOLOPHONIX in the drop-down menu.
Sample Rate
From the 'DEVICE VIEW', open the 'DEVICE CONFIG' tab, and reach for the 'SAMPLE RATE' section to adjust this parameter. You may also adjust other settings if required.
Latency
From the 'DEVICE CONFIG' tab, you can check the current 'Device Latency' and change it if necessary. This will set the network latency. You might also want to check the buffer size of the Audio Engine.
HOLOPHONIX 64, 128 and Ultra rely on the Dante Embedded Platform technology, which allows a minimum latency of 1 ms.
HOLOPHONIX Ultra front screen
The HOLOPHONIX Ultra server is equipped with an LCD touch screen. It is meant to display important information about the server for monitoring and debugging purposes, and facilitate the setup of the processor in a new environment.
Home page
The home page displays an overview of the HOLOPHONIX Ultra status :
- The project name and preset name
- IP address of its interfaces
- The audio engine status
Using its touch screen, the user can click on the “Settings” button to access the settings menu.

| Parameter | Text Label | 🟢 | 🟠 | 🔴 |
|---|---|---|---|---|
| Project - Preset | Project name and preset name | Preset and project loaded | Project loaded, preset loading | No project loaded |
| Dante Primary | Dante primary interface IP | Interface up | - | Interface down |
| Dante Secondary | Dante secondary interface IP | Interface up | - | Interface down |
| Remote Control | Remote interface IP | Interface up | - | Interface down |
| Audio | DSP state and master muted | DSP running and master unmuted | DSP running and master muted | DSP stopped |
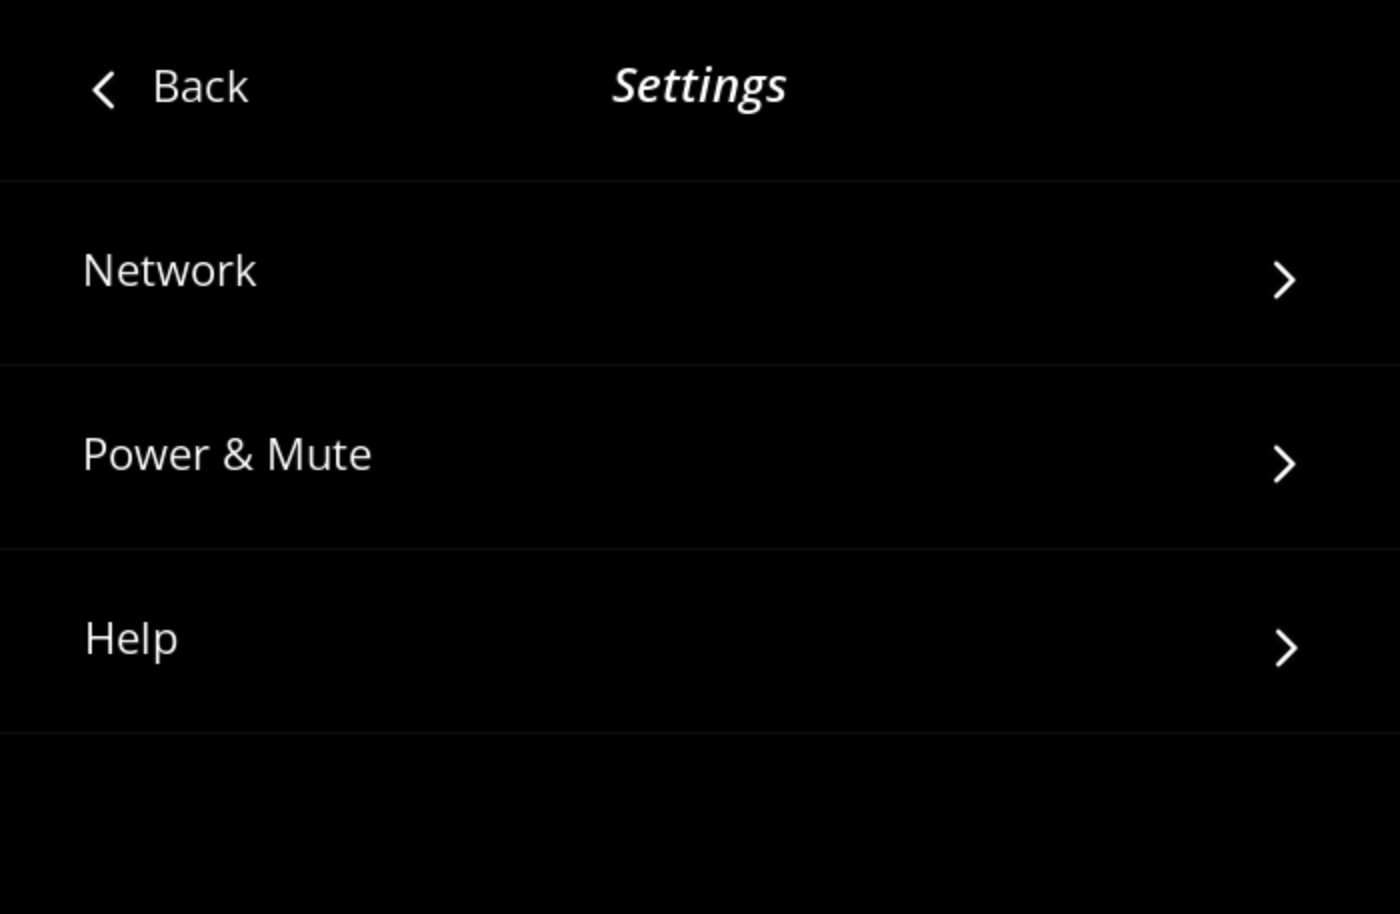
Settings menu
The Settings menu allows the user to configure the HOLOPHONIX Ultra in various ways. The Network menu provides detailed information about the network configuration and enables the setup of a new configuration for each interface.
The Power and Mute menu offers options to shut down or reboot the processor, as well as mute the master output.
Lastly, the Help section displays key information about your hardware and allows you to activate Service Mode if needed. The Service ID is shown to be communicated to the HOLOPHONIX Support team for remote assistance.
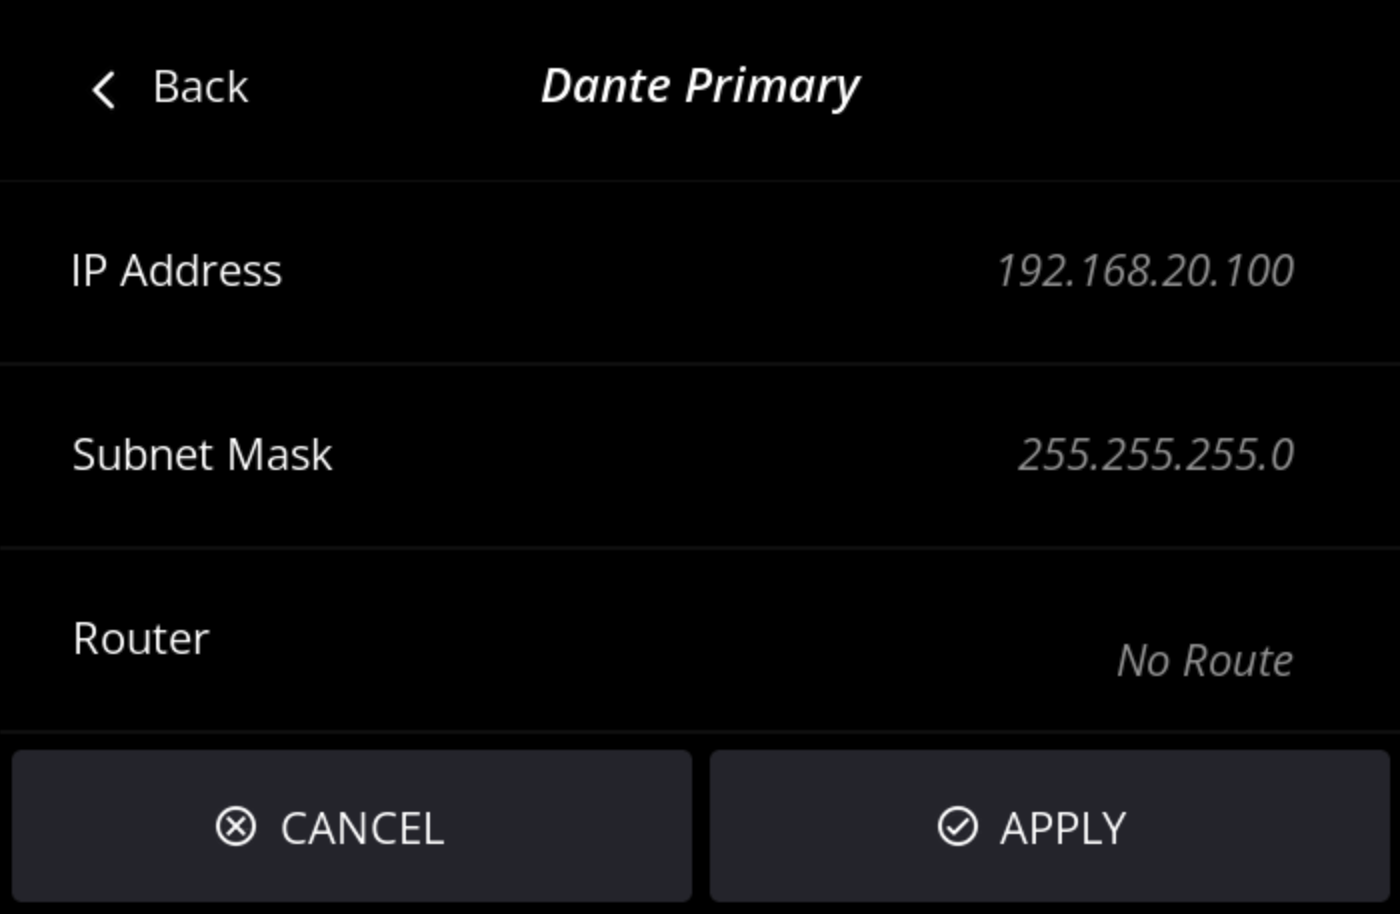
Network menu
The network menu will guide you through the configuration of each network interface. You can choose between automatic/DHCP assignment or a static IP address. When manually configuring the IP address, subnet mask, and routes (gateway), you can always modify the previous steps by clicking the Back button. Your configuration is saved as long as you haven't clicked the Apply button.
Finally, a confirmation window allows you to review your configuration before applying it. If an entry is not formatted correctly, it will appear in red, and the Apply button will be disabled. Navigate back to make corrections if needed.
Setting an empty route is allowed; in that case, a default route will be applied.
Lock Menu
Just updated your HOLOPHONIX Ultra processor? The default PIN code is 0000! This same code is also applied when you reset the PIN from the Remote UI.
The lock menu helps prevent unwanted operations on the front screen by restricting access through a PIN code shared by both lock functions.
There are two levels of locking:
- Lock Display: Hides all information normally shown on the front screen.
- Lock Settings: Keeps the main page visible, but requires the PIN to access any configuration. If the lock icon 🔒 is shown on the "Configure" button, the settings are locked.
Once the screen is set to a locked mode, the configuration remains persistent — even after a reboot — until the correct code is entered.
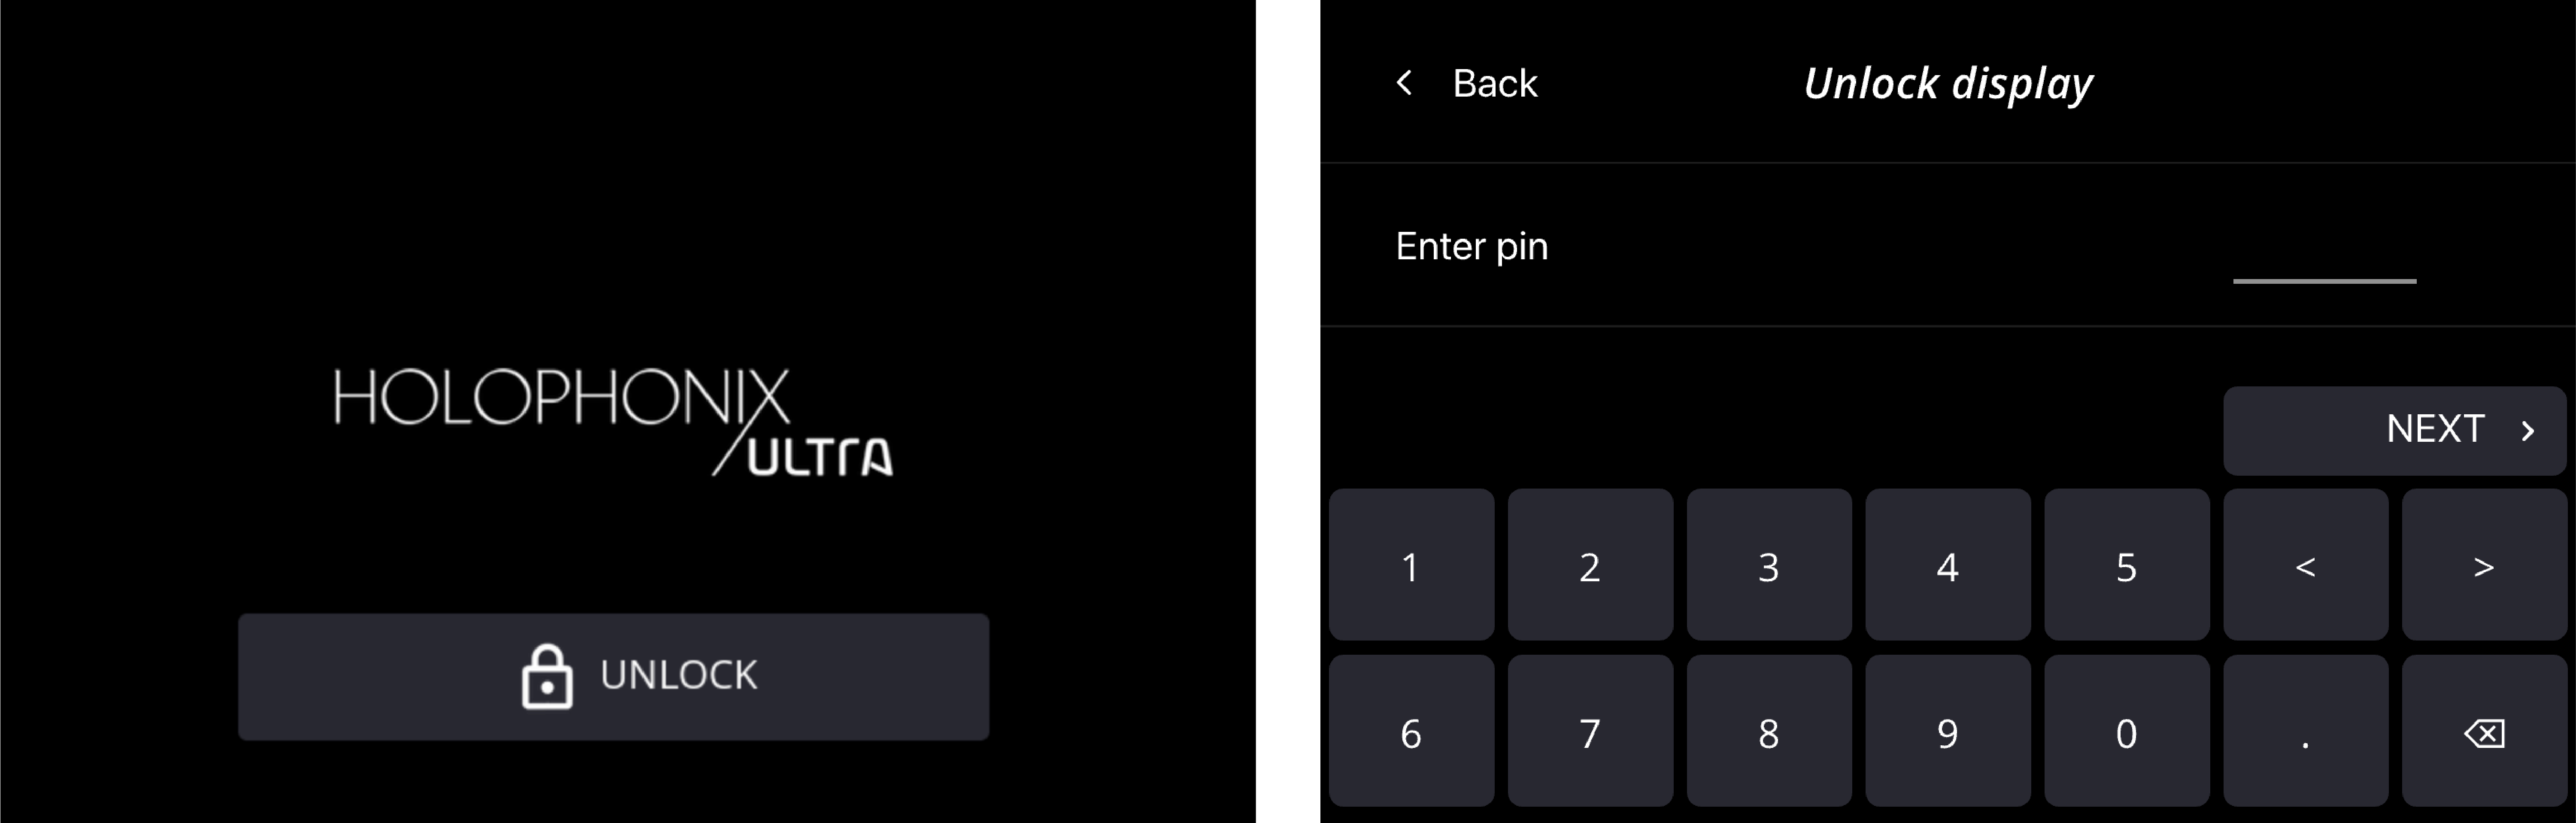
Changing the password :
To set a new lock pin code, you must first enter the current code. Once confirmed, you can enter the new code. The new code is displayed to be checked before it is applied.
If you forgot the password, you can reset the password from the remote interface. Going to Settings | Interface window, you can access the Reset lock code button in the Front Screen section. The password will be reset to 0000.
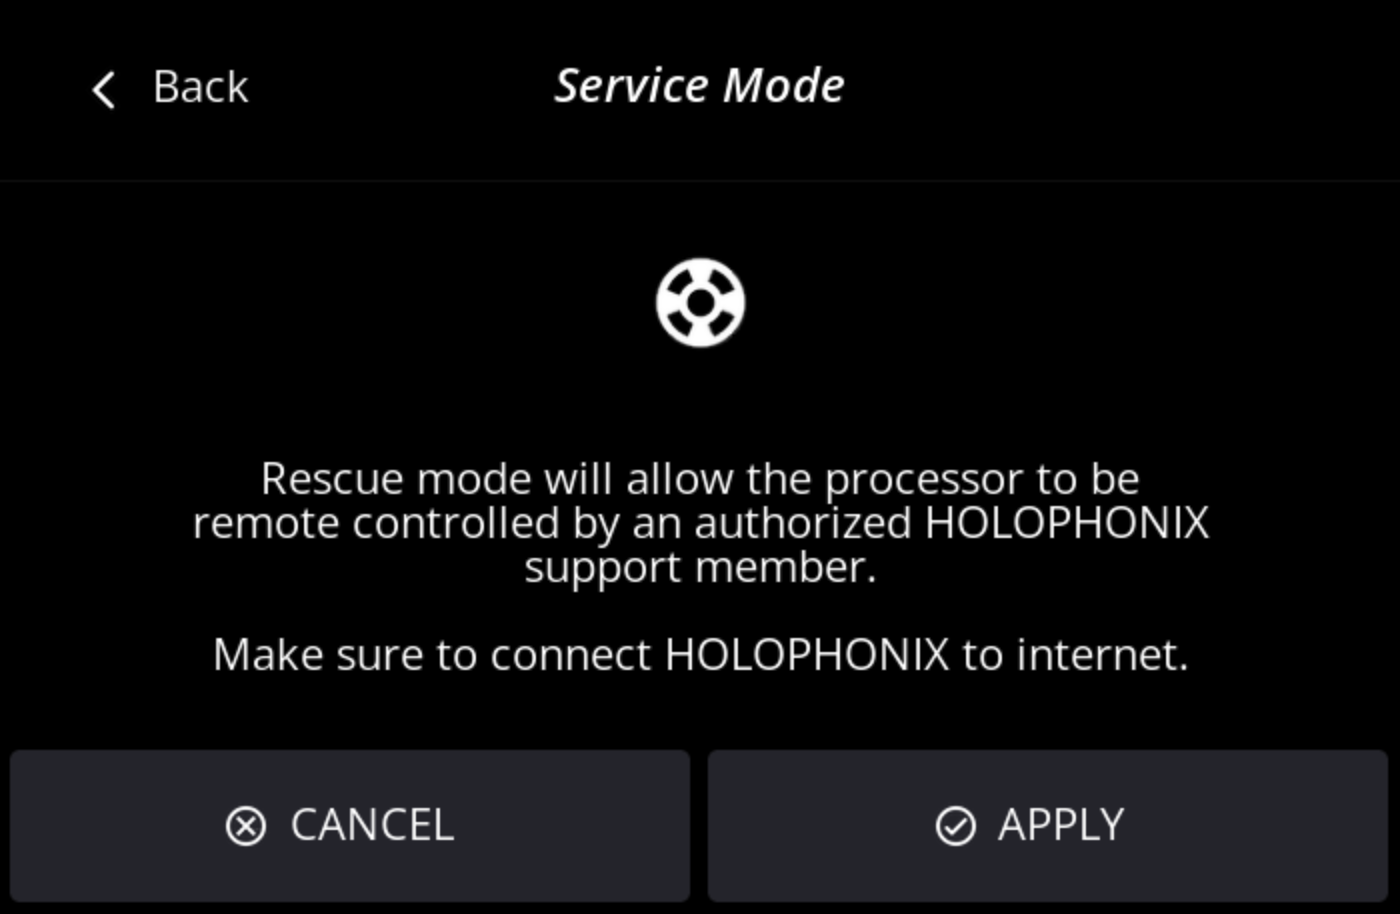
Service Mode
The Service Mode is a special mode that allows the HOLOPHONIX Support team to remotely access the processor and help you with any issues you might encounter. It can be activated or deactivated at any time from the remote interface on your browser in Settings | Interface window. The front screen only allows you to activate it, in case of a hardware issue.
Troubleshooting:
My remote interface is plugged in but "No IP 🔴" is displayed :
The interface is down, the system is unable to see any computer on the network. Try a point-to-point direct connection with your computer. If it mounts, see the following section.
My remote interface is up (🟢) but I cannot access the remote app:
Check your computer network configuration to set up in the same IP range as the remote interface. See this previous section for more info.
Audio is stopped (🔴) :
If no project is loaded, the DSP is stopped. The DSP will run once project and preset are loaded.
If a project and preset are loaded, check the logs in the parameter window on your remote access. The DSP might be unresponsive or overloaded.